Maximizing Productivity with Azure DevOps & Logic Apps
In today’s fast-paced business landscape, maximizing productivity is crucial for staying competitive and delivering outstanding results. By seamlessly integrating Azure DevOps and Logic Apps, organizations can achieve significant productivity gains.
In this blog post, we will explore a real use case scenario for a Support System. This will demonstrate how this integration can maximize productivity within your organization, and provide efficient assistance to the customers.
Workflows
There are two essential workflows in our use case (Support System):
Workflow (1): Ticket Creation and Customer Notification
The first workflow begins when a customer sends an email to the support team, this will be the trigger for the Logic App, and once it is triggered, it performs two actions:
Create a New Ticket: A new work item of type
Ticketwill be created in our Azure DevOps Organization project. This ticket will be populated with all the information required like the sender, and all necessary details extracted from the incoming email.Send an auto reply Email: After creating the ticket, an auto-reply email will be send to the customer, acknowledging their request and informing them that their ticket has been successfully created.
The support team then reviews the board, identifies the newly created ticket, and starts working on it. Once the ticket is closed, this will trigger the second workflow.
Workflow (2): Ticket Closure and Solution Delivery
The second workflow comes into play when a support agent successfully resolves the customer’s issue and closes the corresponding ticket.
The closure of the ticket serves as the trigger for this workflow. As soon as the ticket is closed, the Logic App takes over and executes a crucial action:
Customer Solution Delivery: An email will be send to the customer, containing the comprehensive solution to their ticketed issue.

Prerequisites
Before proceeding with the implementation of the demo, it is necessary to complete the following steps:
Create a new customized inherited process within your Azure DevOps organization.
Create a new work item type (Ticket) within the newly created process.
Create two custom fields to this newly created work item type.
The first custom field should be of the single-line string type, designed to capture the customer’s email address.
The second custom field should be of the multi-line string type, designed to capture the customer’s issue resolution.
Create a new project in your organization based on the created process in
step (1).
Implementation
Before start creating our Logic Apps, let’s have a look at the board, it appears as shown in the following screenshot:
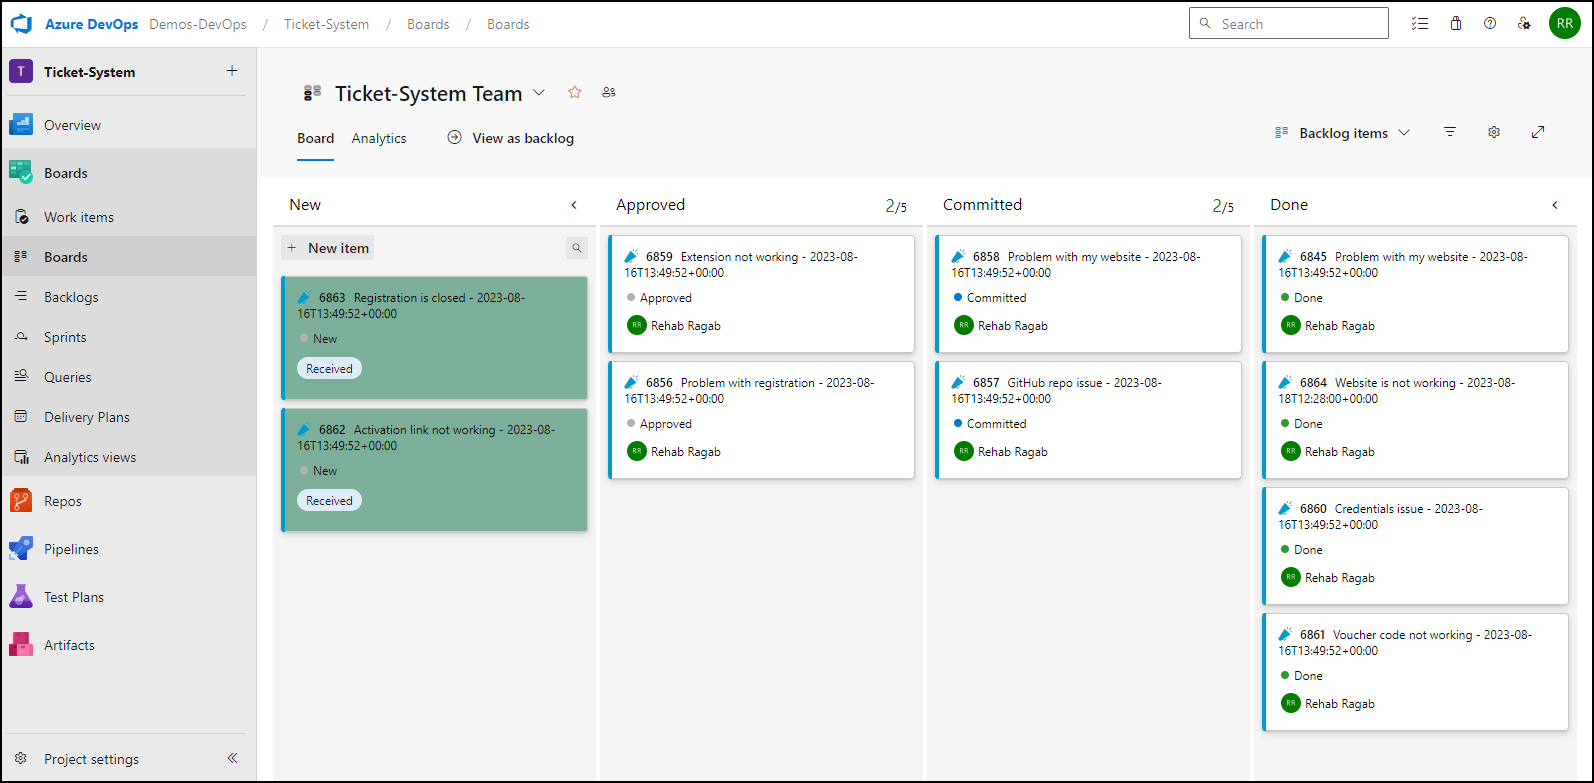
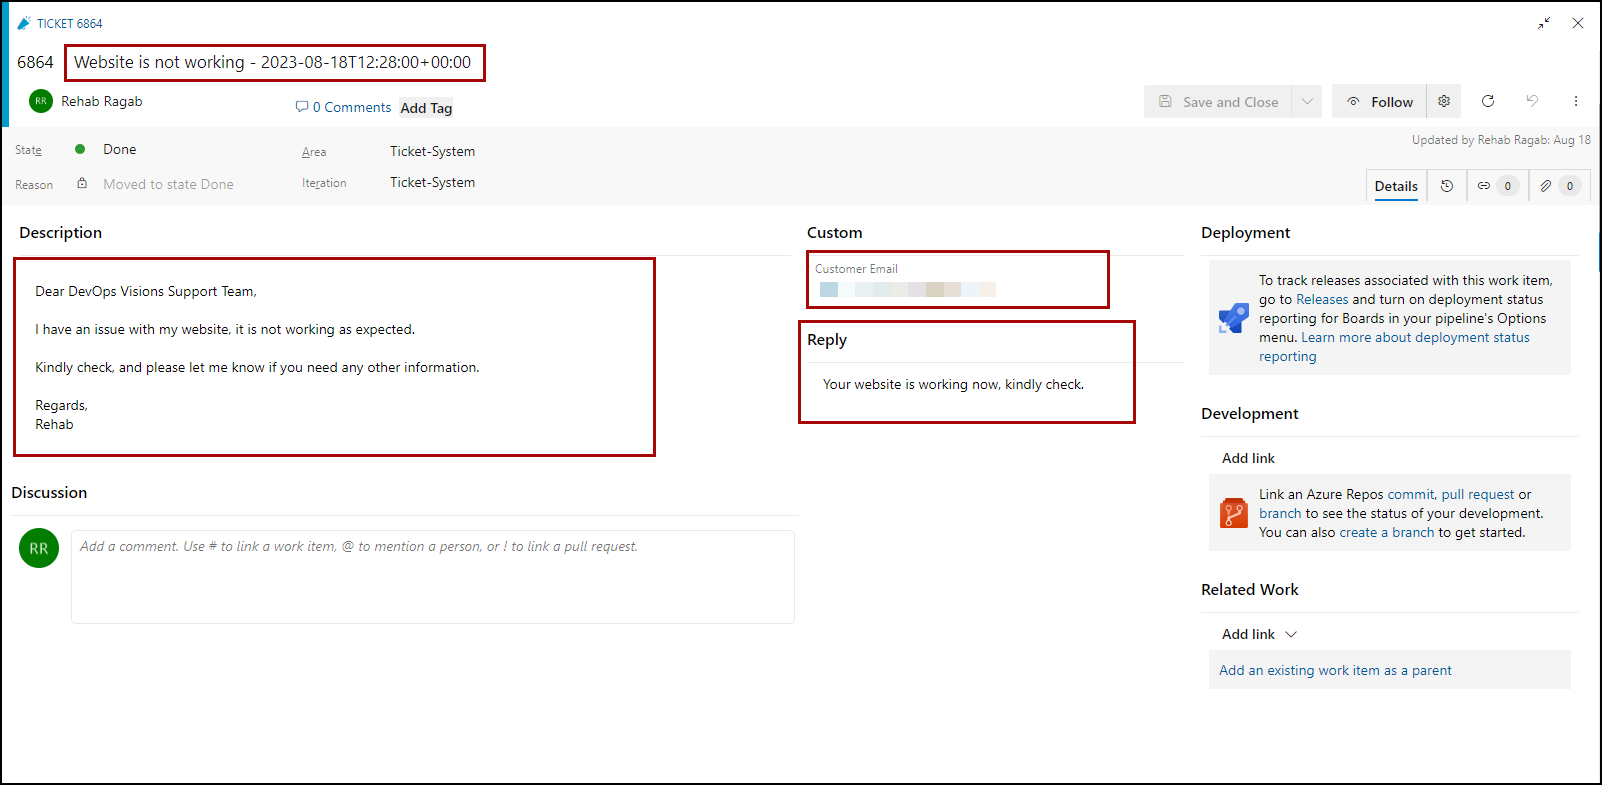
If we open any ticket to have a look from inside, you’ll see that it has an ID (which is unique), a title, a description, and the two custom fields (Email, Reply) that we previously created as prerequisites.
Task (1): Developing the first workflow
Log in to your Azure account at https://portal.azure.com.
In the home page search for
Logic Appand select it.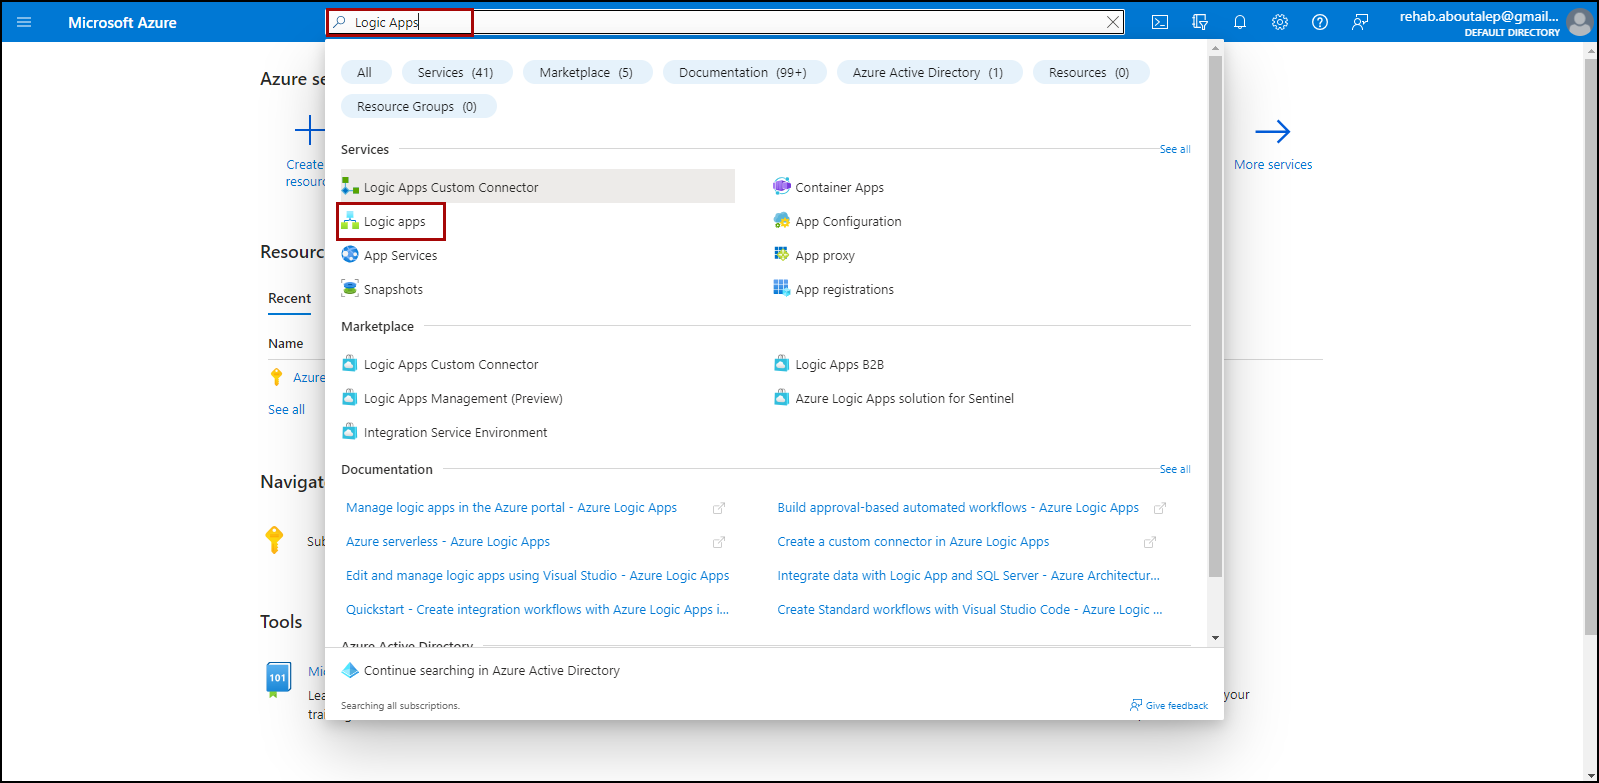
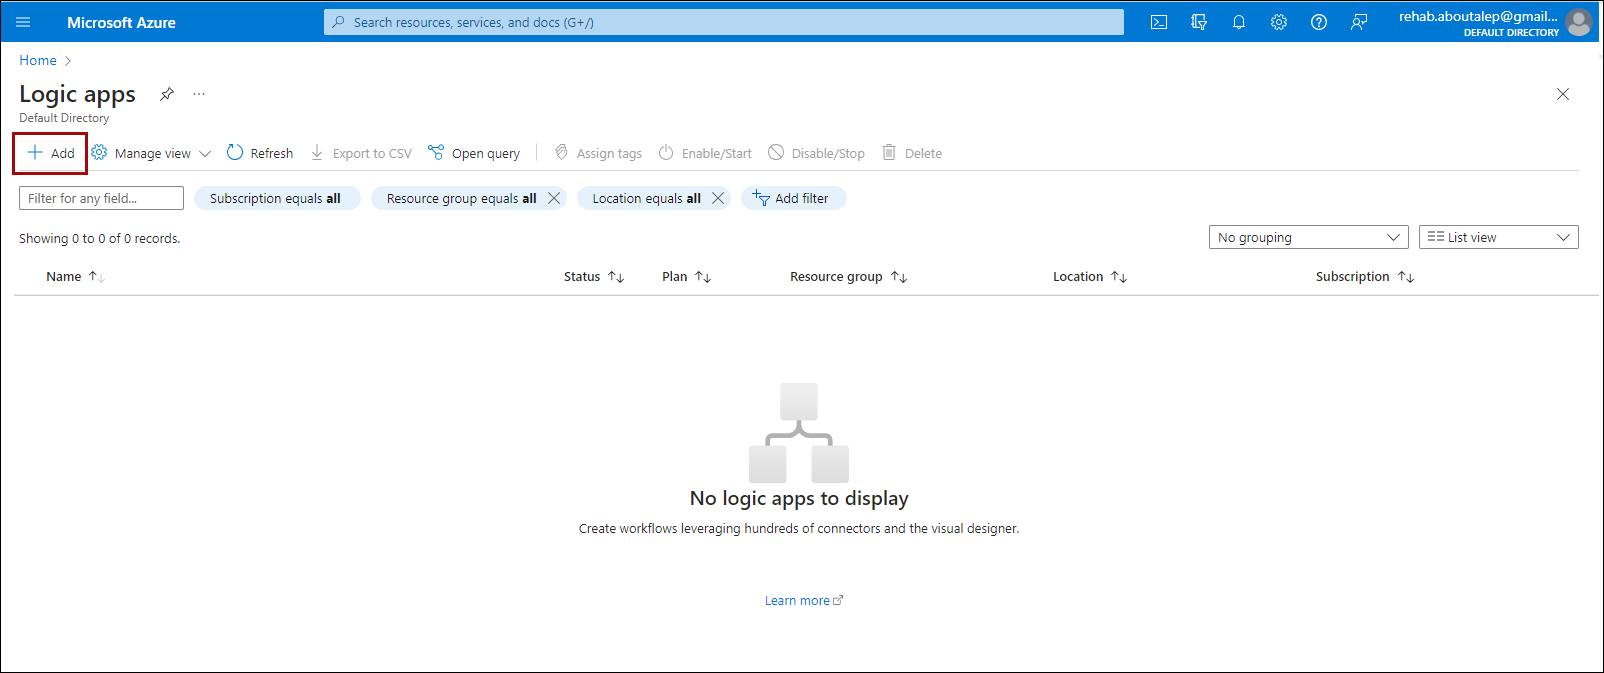
Click on Add in Logic Apps page.
Under Resource group, click Create new. Enter the desired name and click OK, you can also select an already existing one from the dropdown menu.
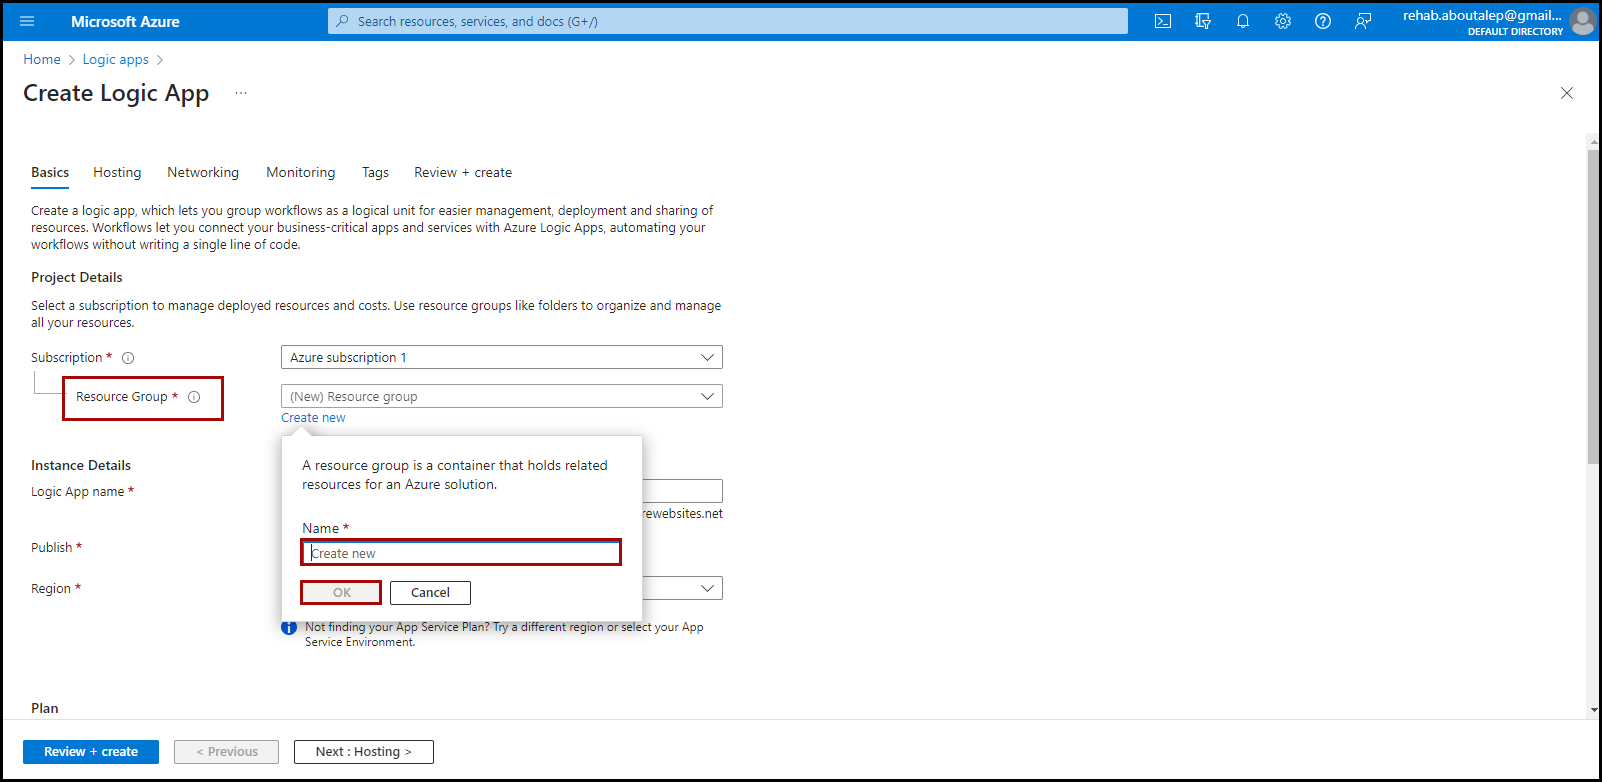
In the Basic tab, choose your subscription, provide a name for your Logic App, select the desired region, and specify the Plan type which dictates how the logic scales, what features are enabled, and how it is priced.
There are two plans:
- Standard: Best for enterprise-level
- Consumption: Best for entry-level. Pay only as much as your workflow runs.
I will select the Consumption plan for this demo. It’s important to note that under this plan, a single Logic App can have only one workflow, so if we need to create more than one workflow we will need to create separate Logic Apps for each one.Then click on
Review + create.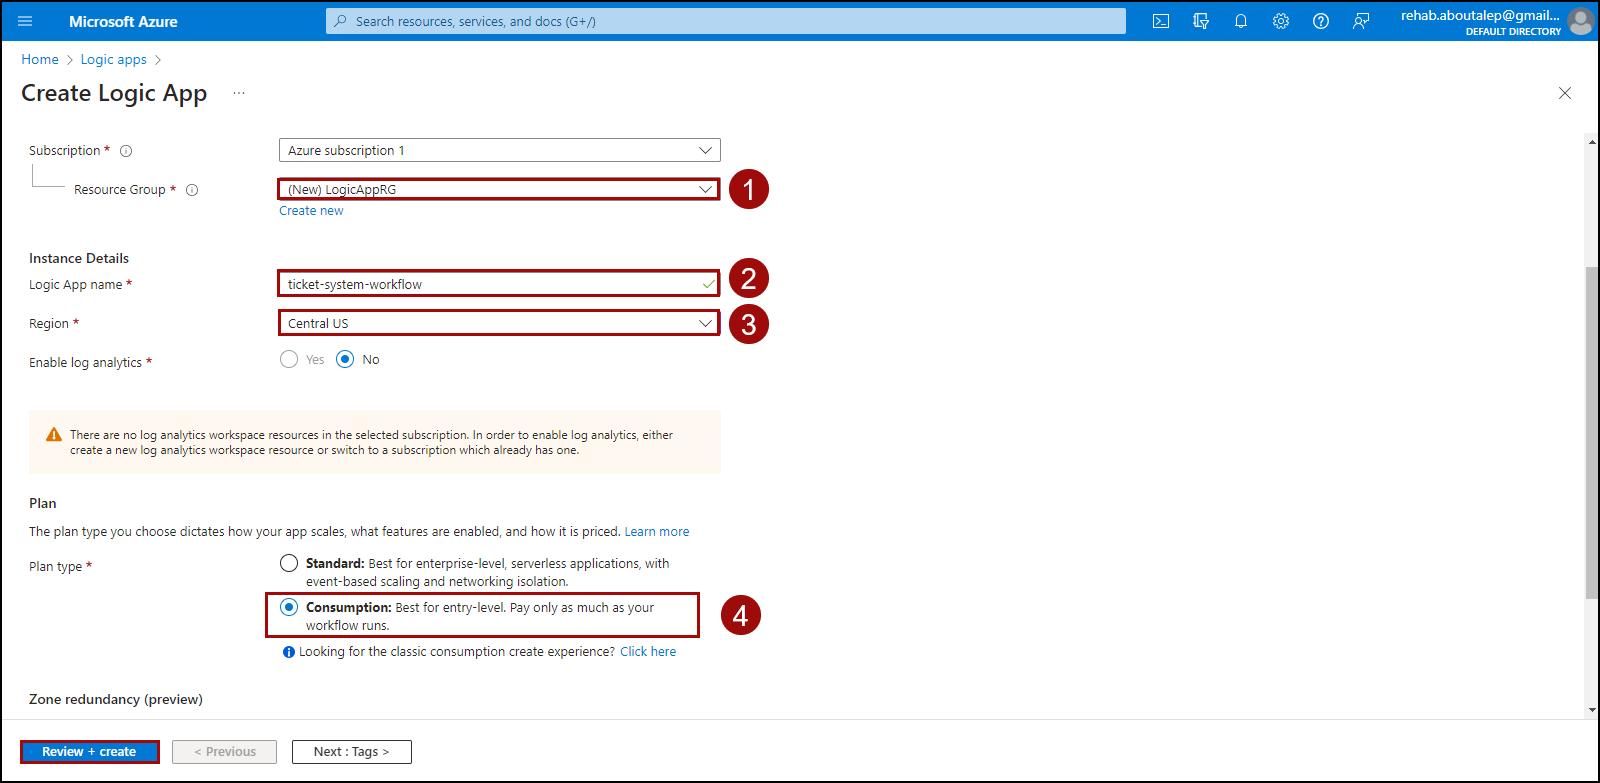
The deployment will take some time, and after it’s completed you can click on
Go to resource.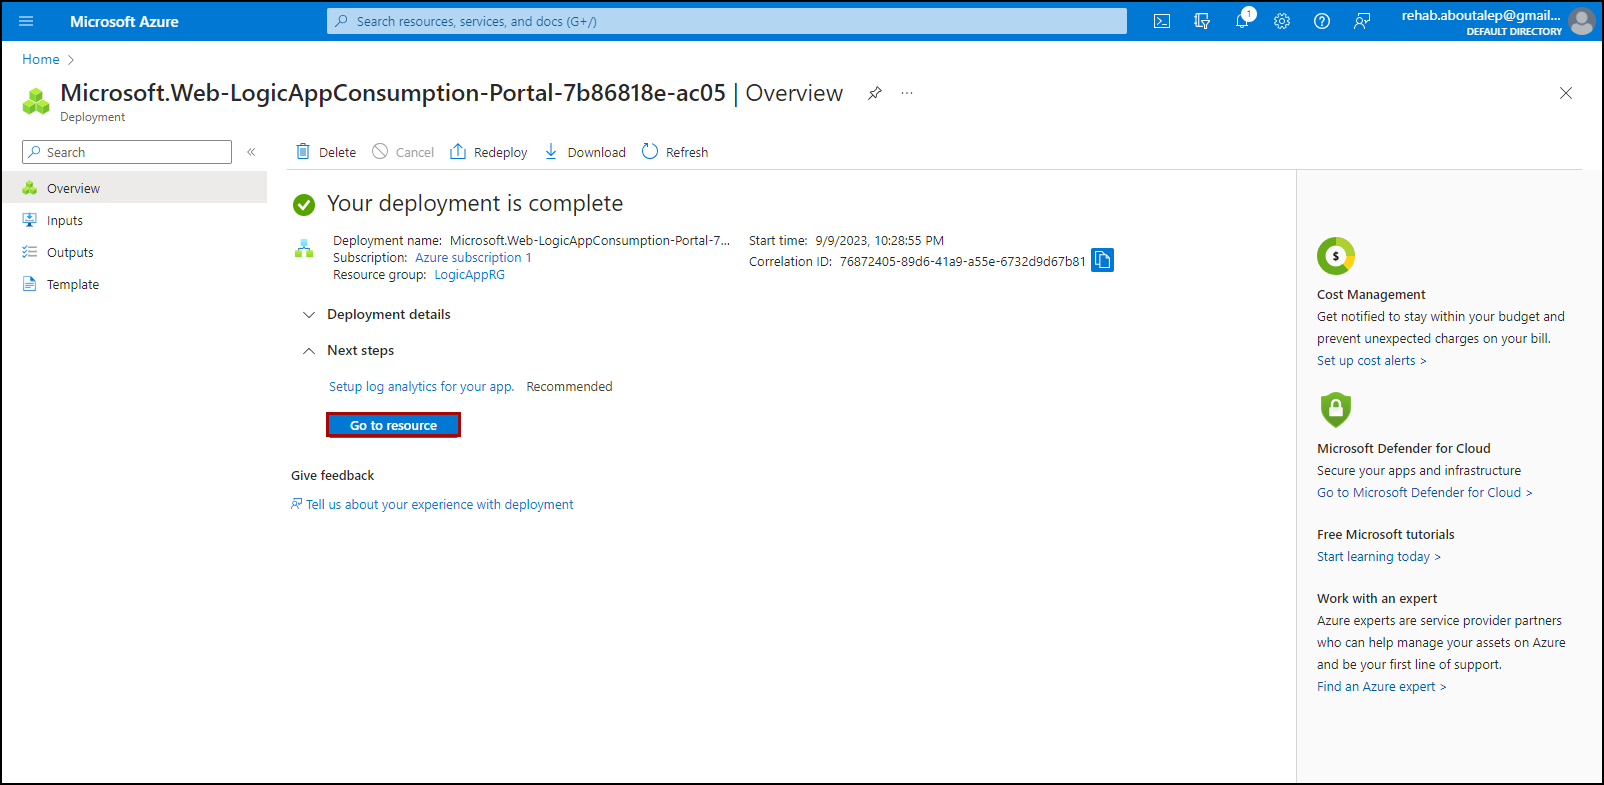
Once click on Go to resource, it will immediately open the
Logic App Designerview for the deployed Logic App.With this View, we can visually develop our first workflow. Select Blank Logic App.

In the workflow designer you can find a list of connectors which we can use to integrate with other systems like Azure DevOps and Outlook in our scenario.
In a connector, each operation is either a trigger condition that starts a workflow or a subsequent action that performs a specific task.
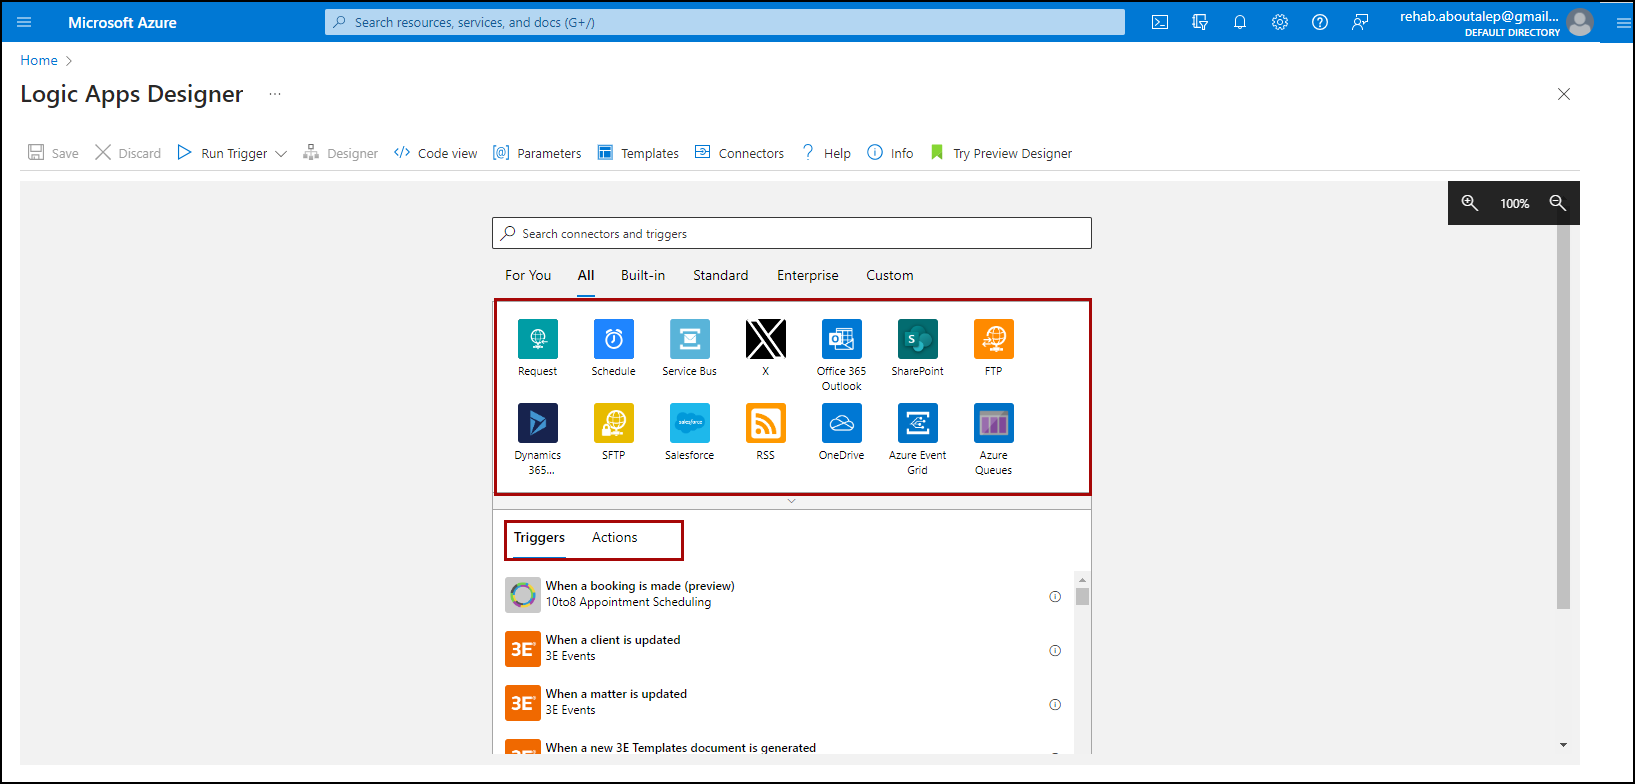
The trigger is always the first step in any workflow that specifies the condition to meet before our workflow can start to run.
The trigger for our scenario is when receiving an email from a customer in our Outlook inbox. Search for Outlook connector and select it.
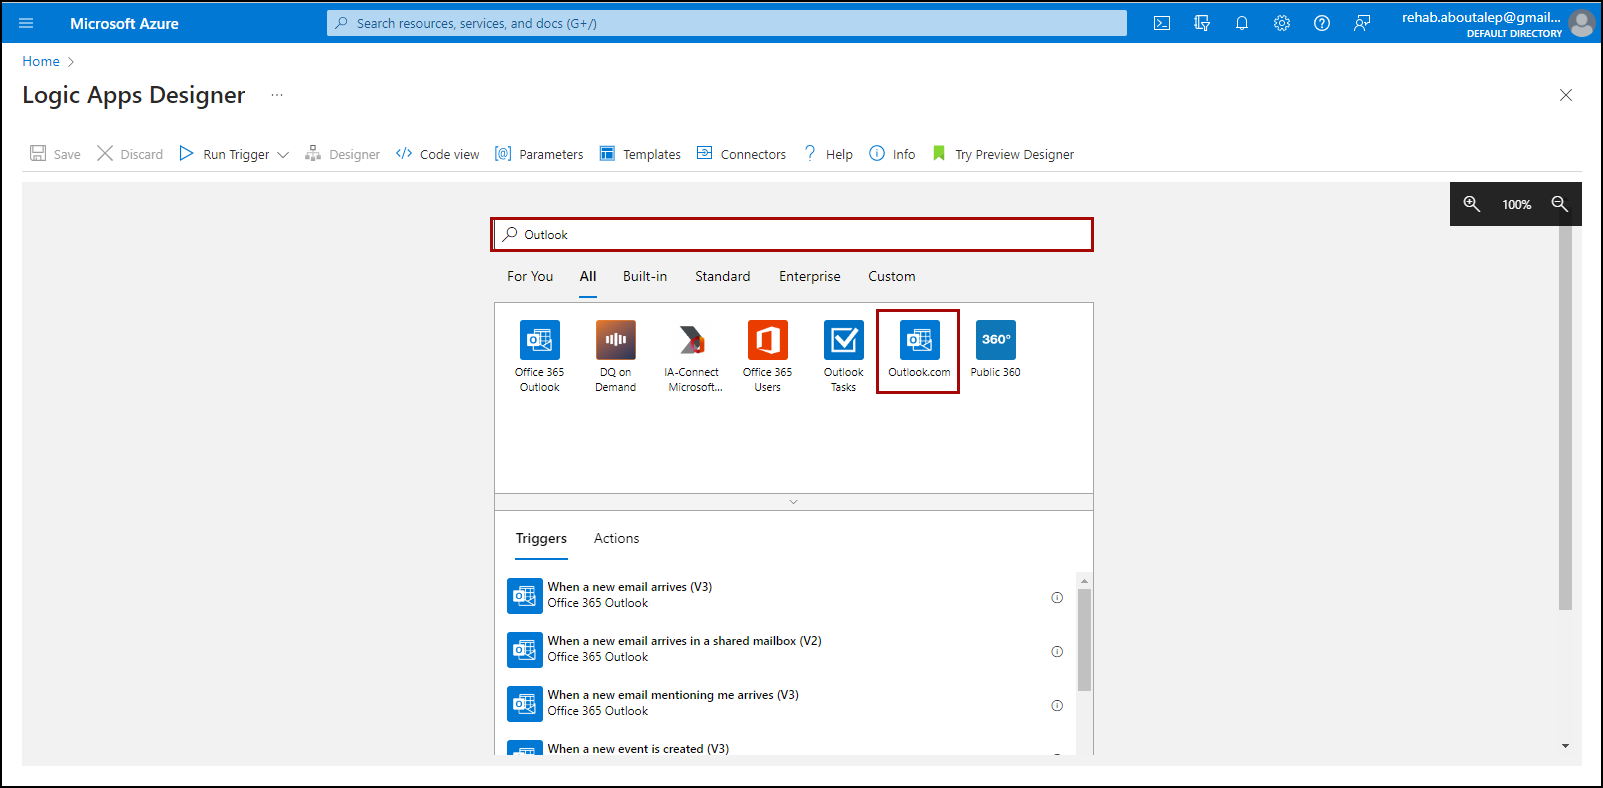
Upon selecting the connector, you will find a list of the triggers and actions for this connector. search for
When a new email arrives (V2)trigger and select it.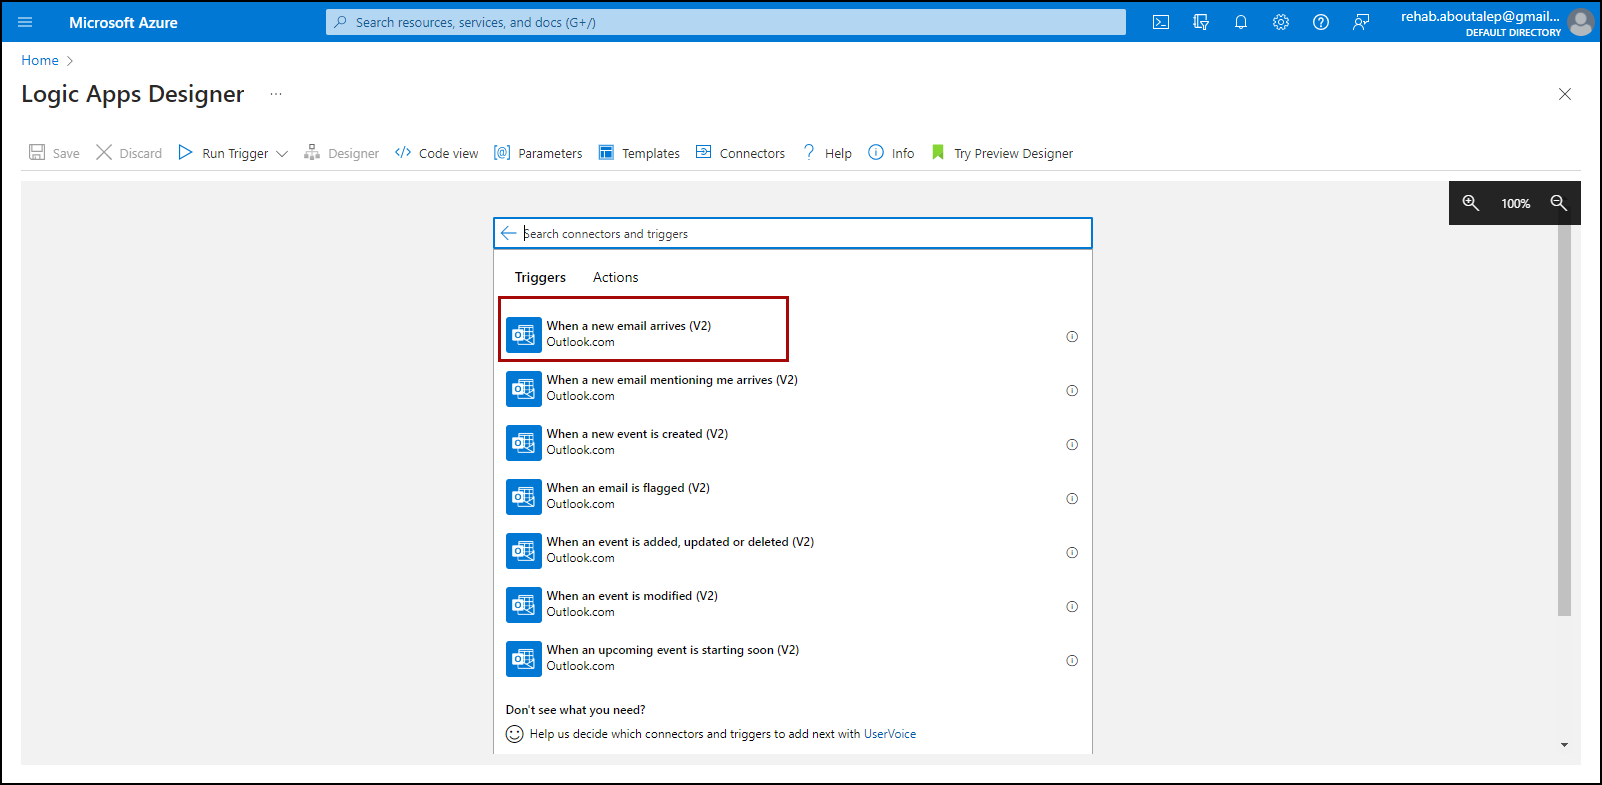
Most connectors typically need you to create and set up a connection to the associated service so that we need to authenticate access to Outlook.
Click
Sign inand use your email, which is where you’ll receive customer issues.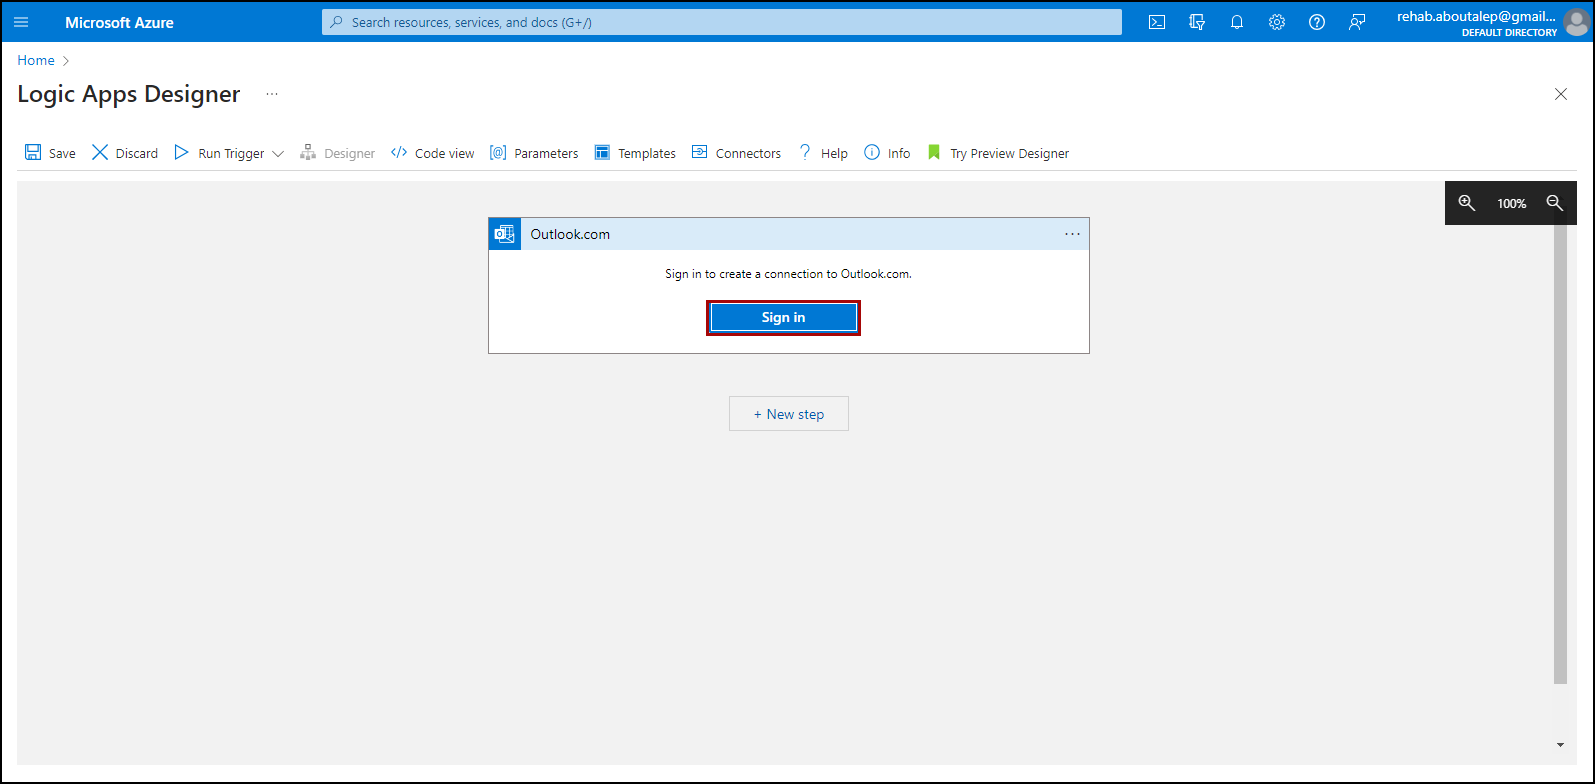
Now it is time for adding actions. To add the first action under the last step in the workflow, select
New step.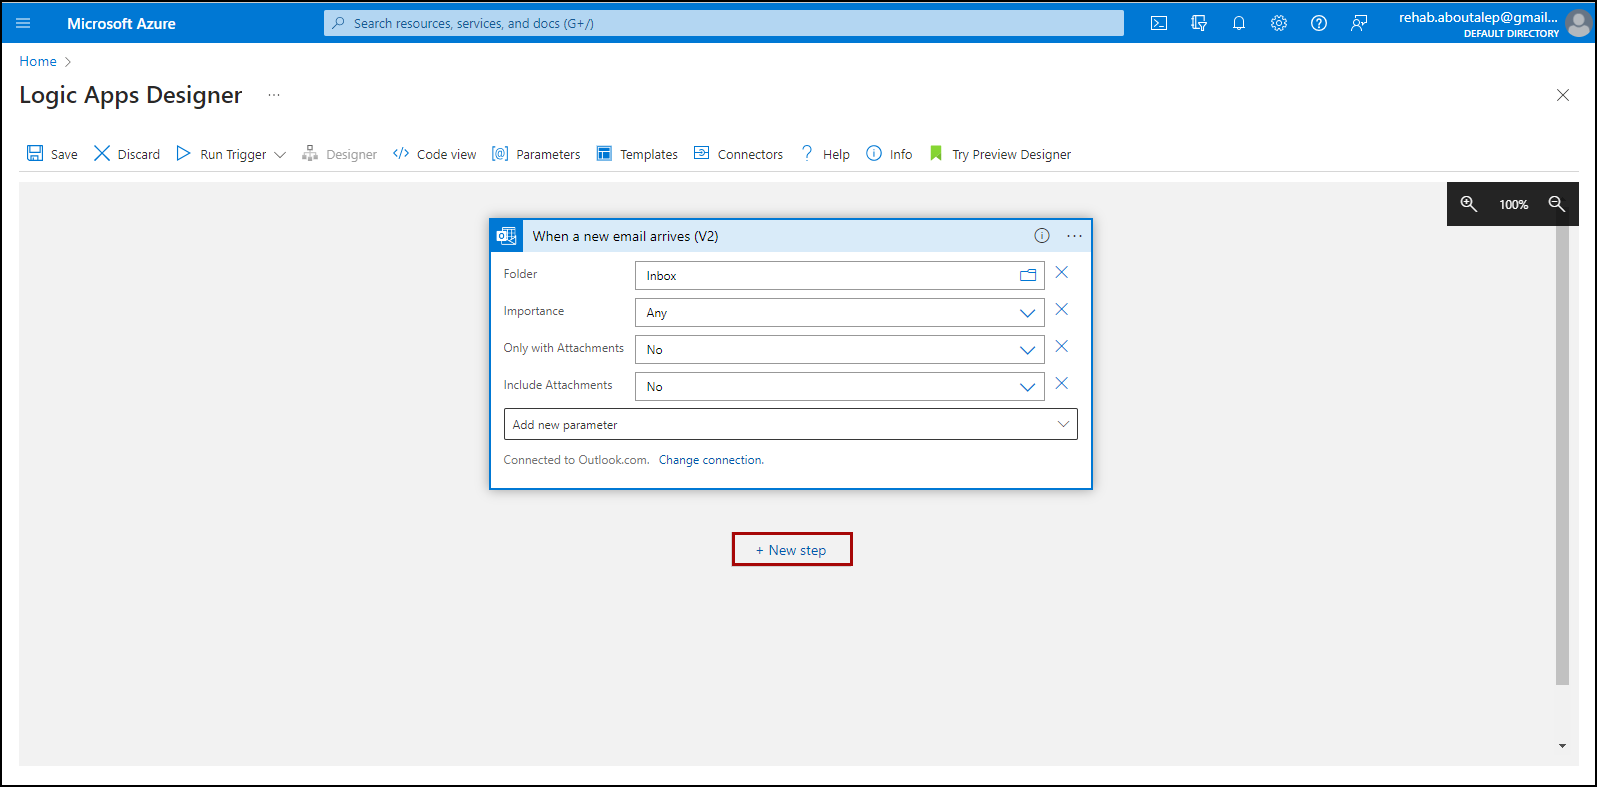
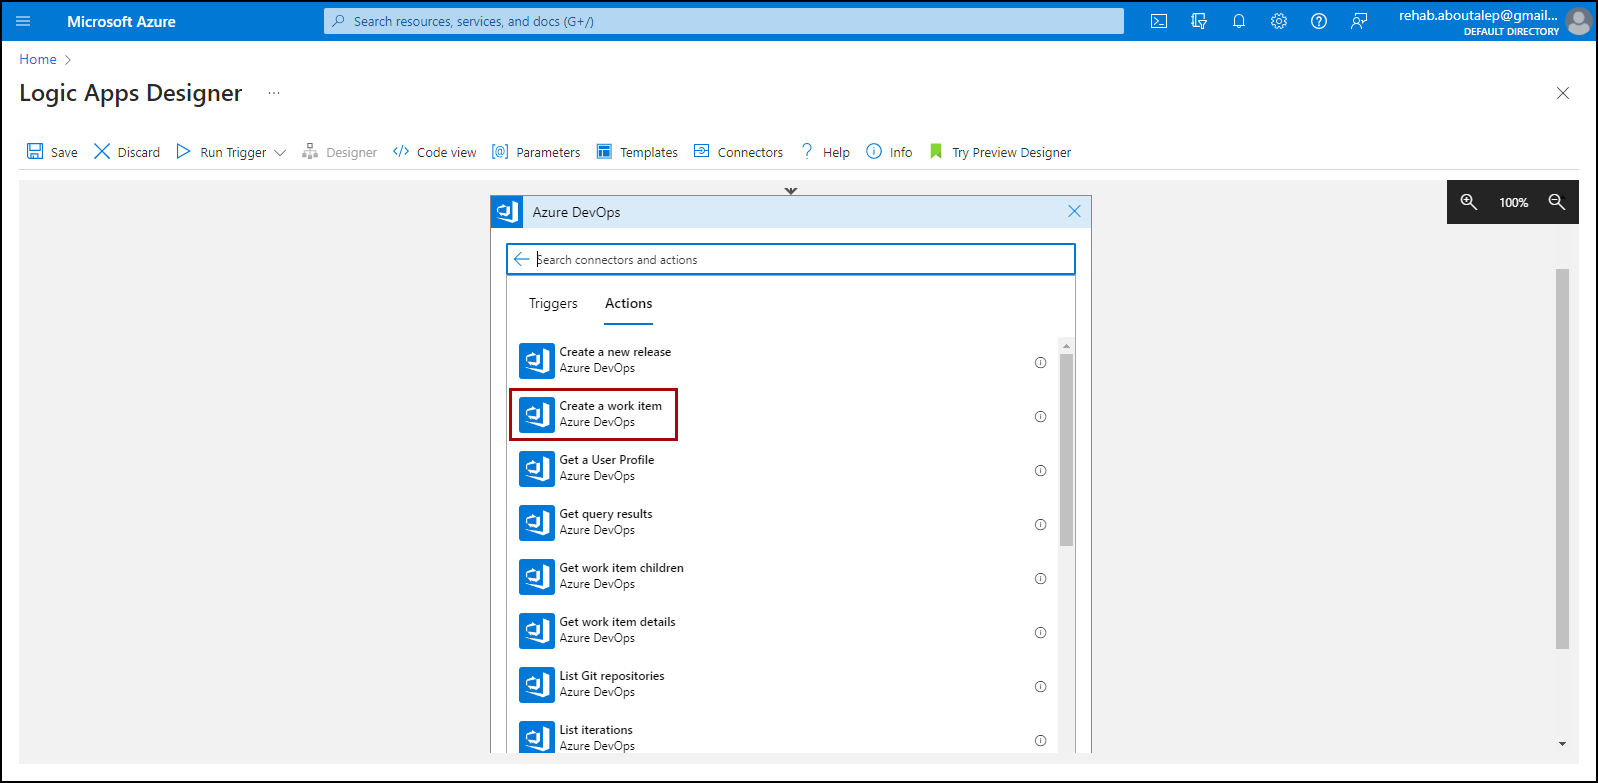
As our first action is to create a new work item in our Azure DevOps organization project, we must establish a connection to Azure DevOps.
Search for Azure DevOps Connector select it, and then select the required action which is
Create a work item.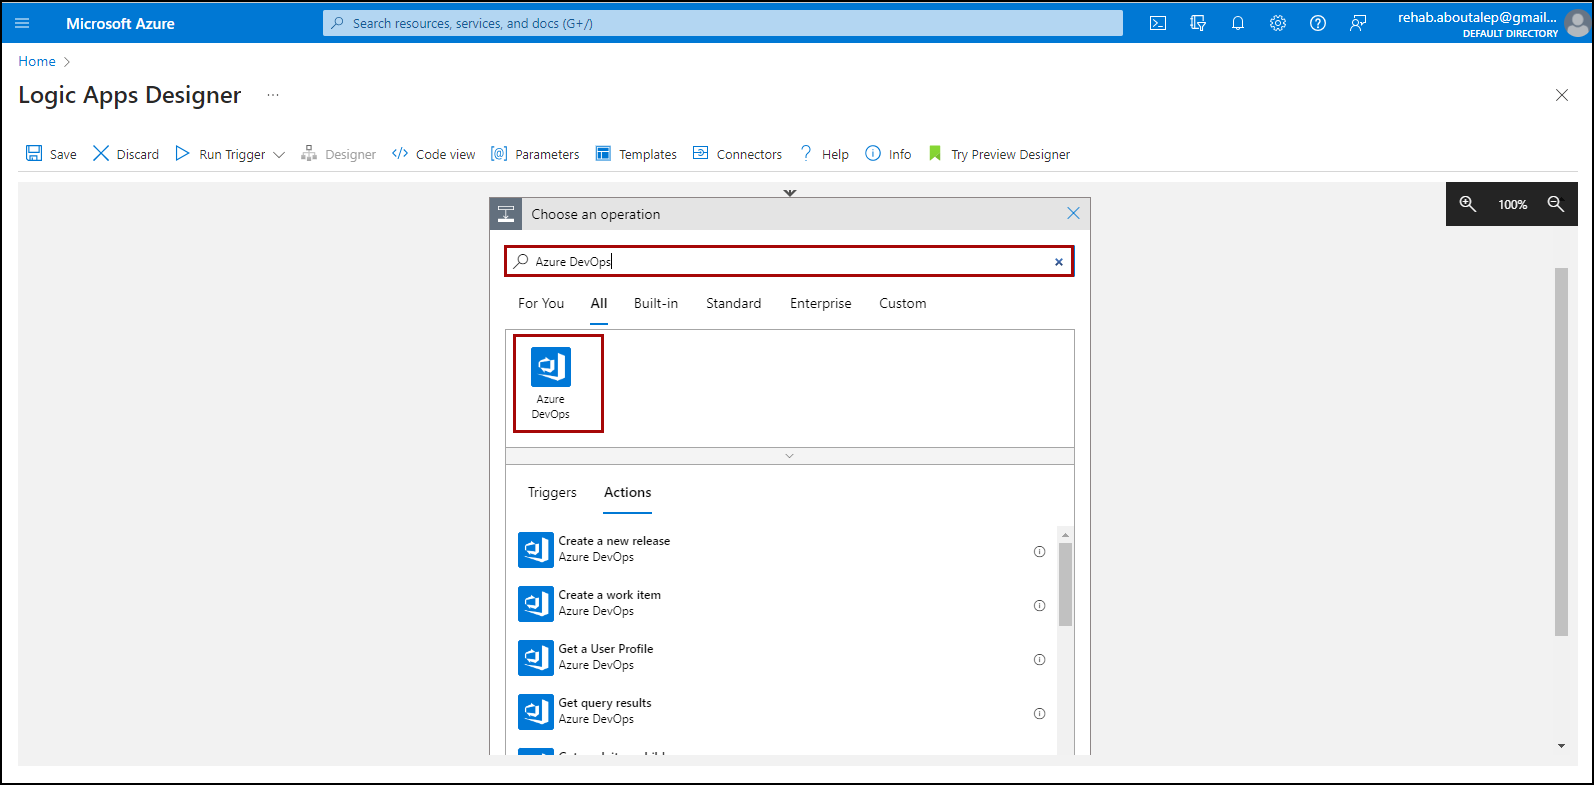
Click
Sign into your Azure DevOps organization.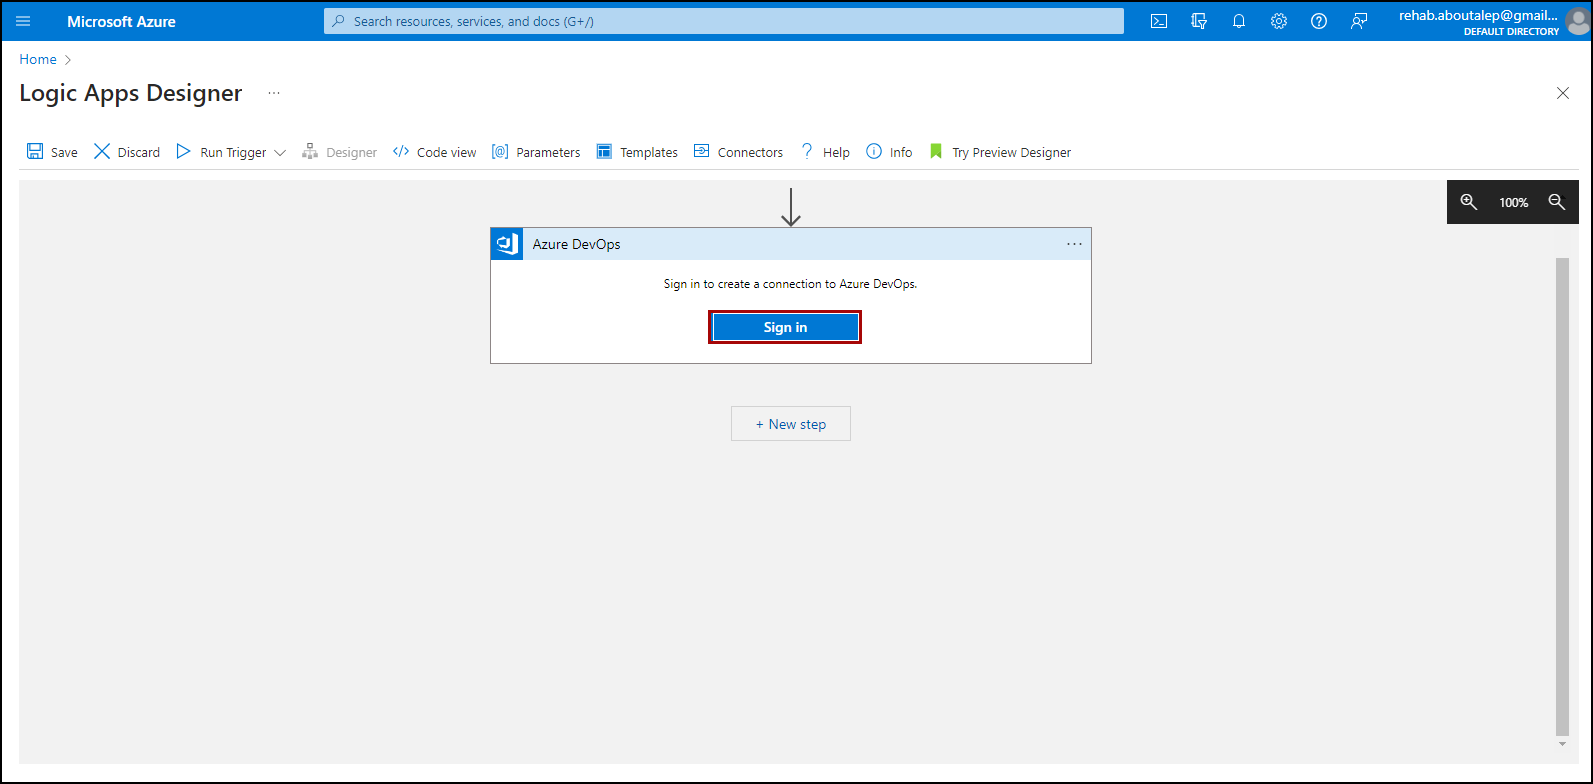
Add the required attributes:
- Organization Name
- Project Name
- Work Item Type
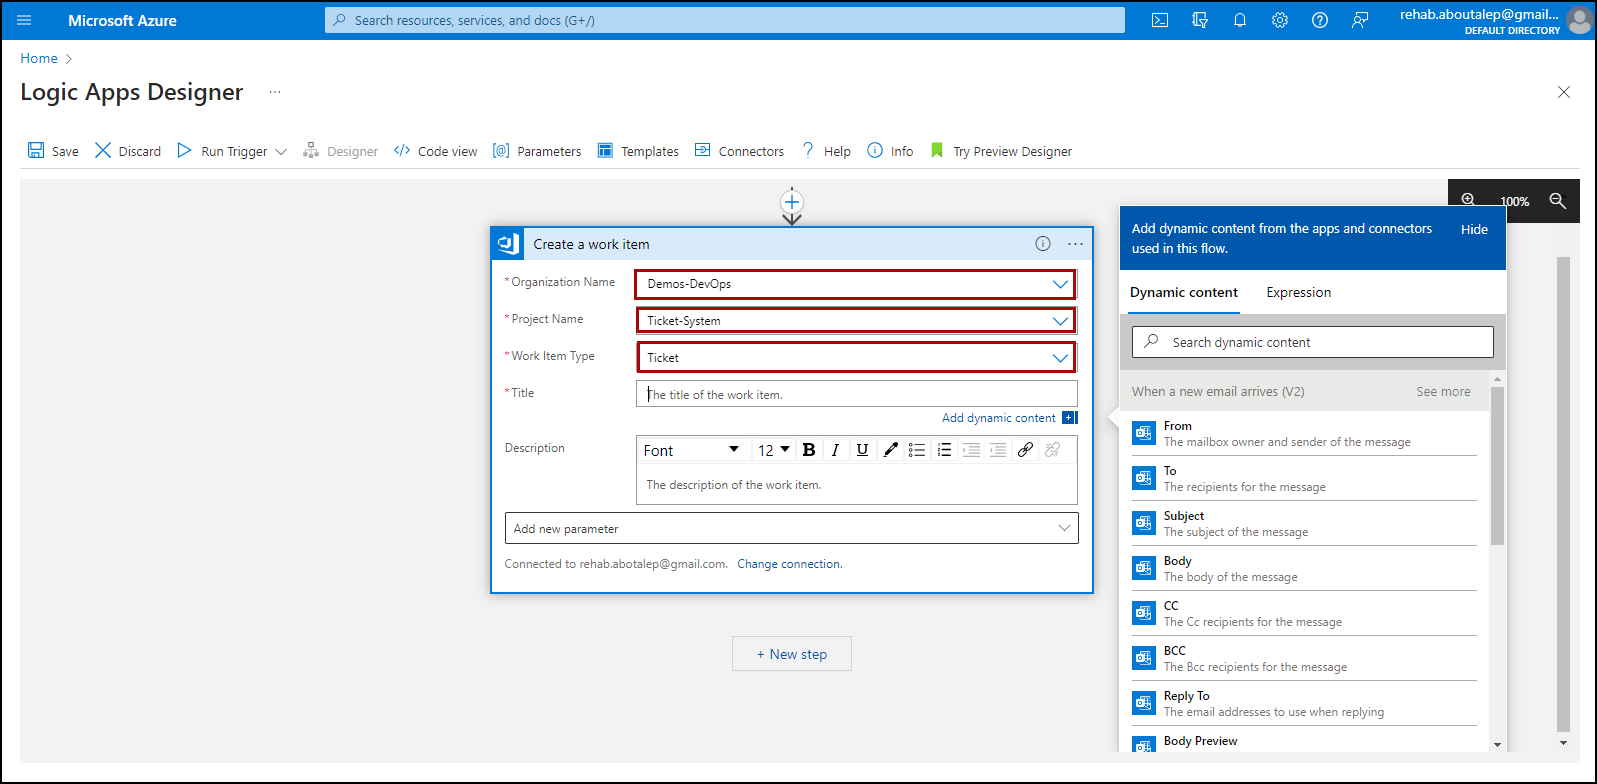
What should be the title of the work item? In our case we need it to be the subject of the customer’s email, so how we can access that? there is a feature in the Logic App that you can access content from the last step.
Select
Subjectfrom the right menu.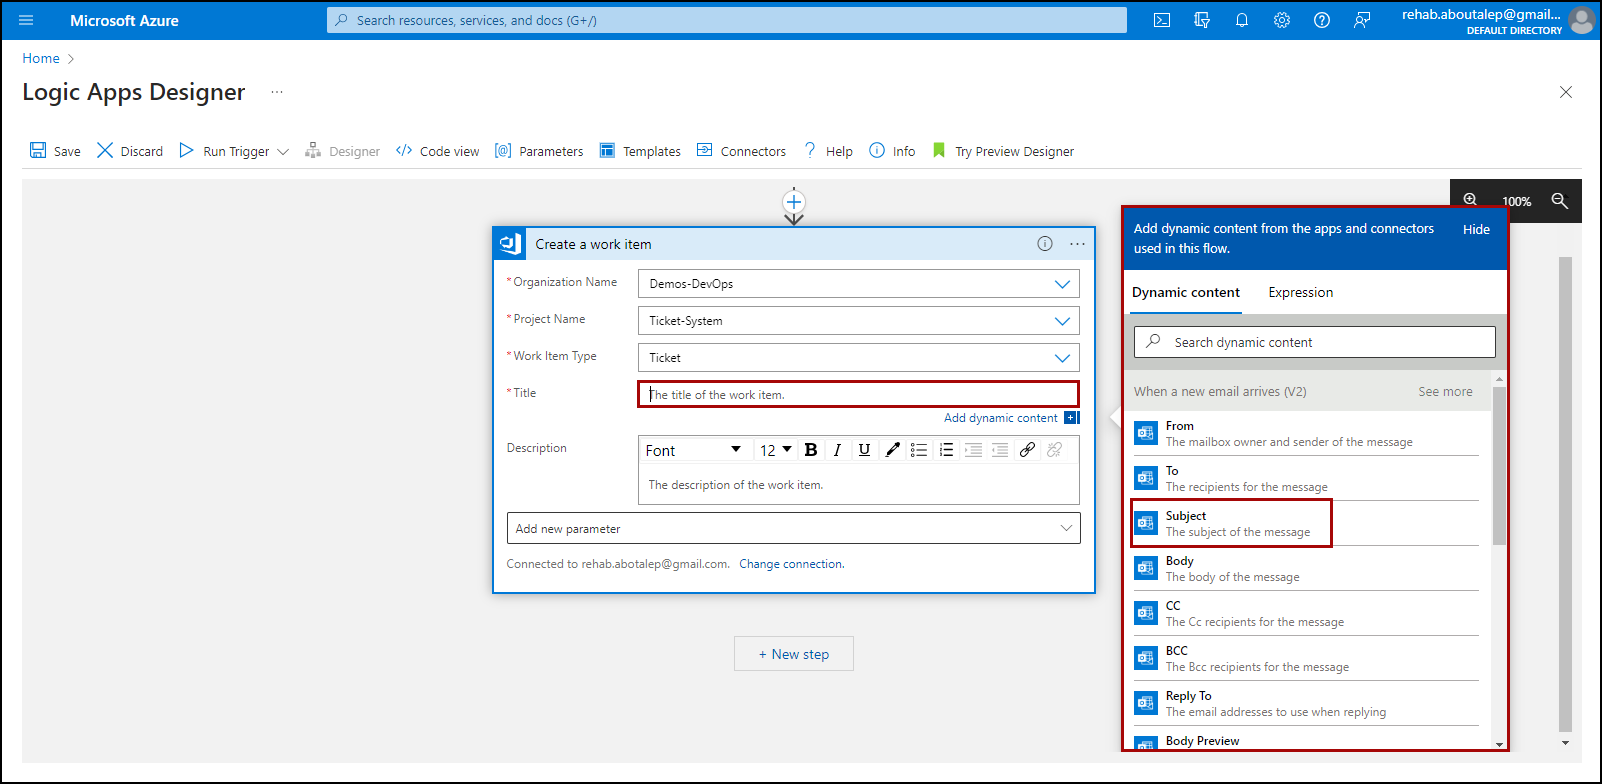
For the Description attribute, select
Body(The body of the customer’s email).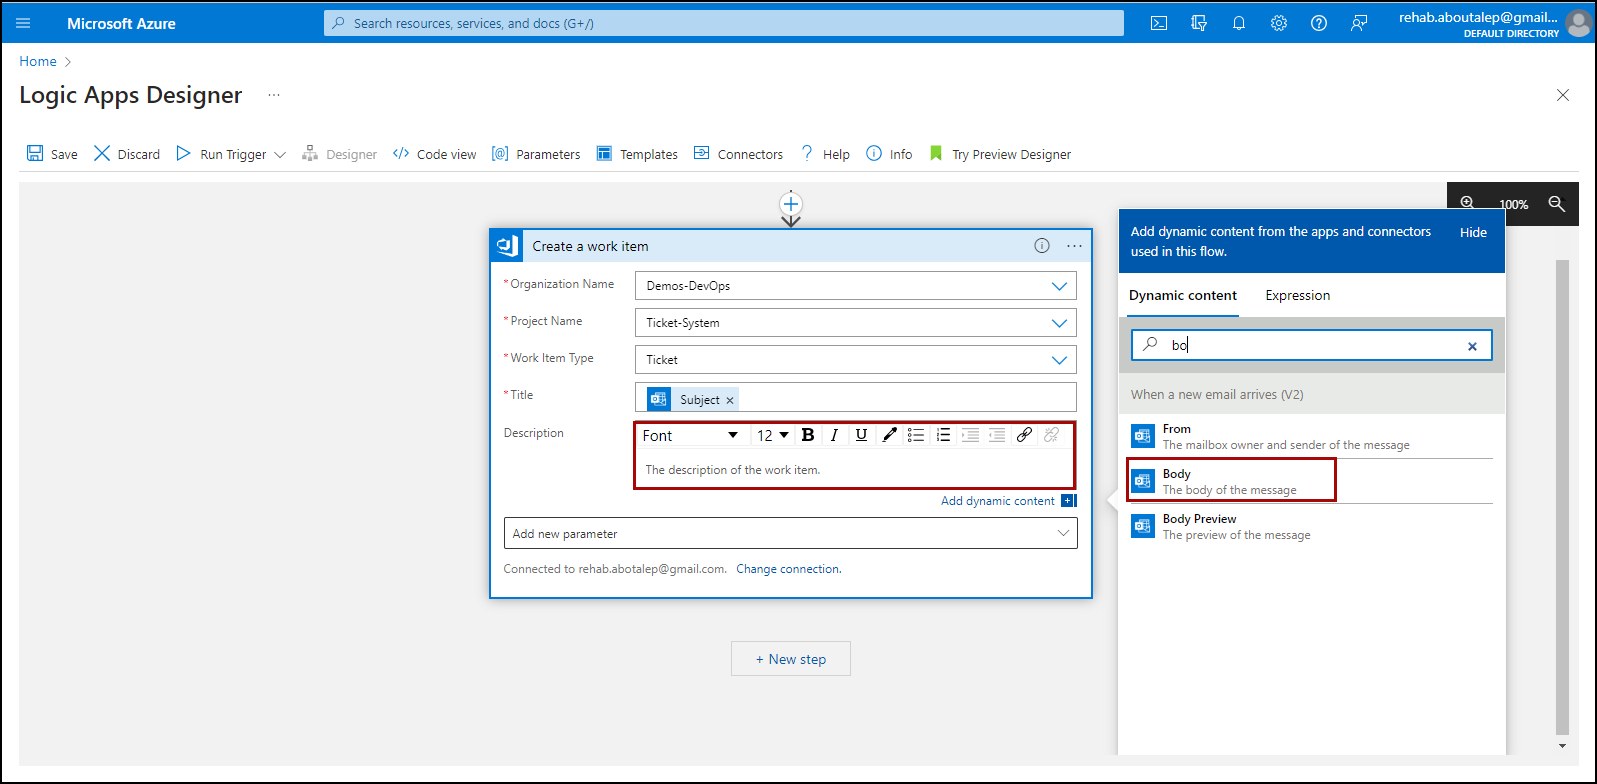
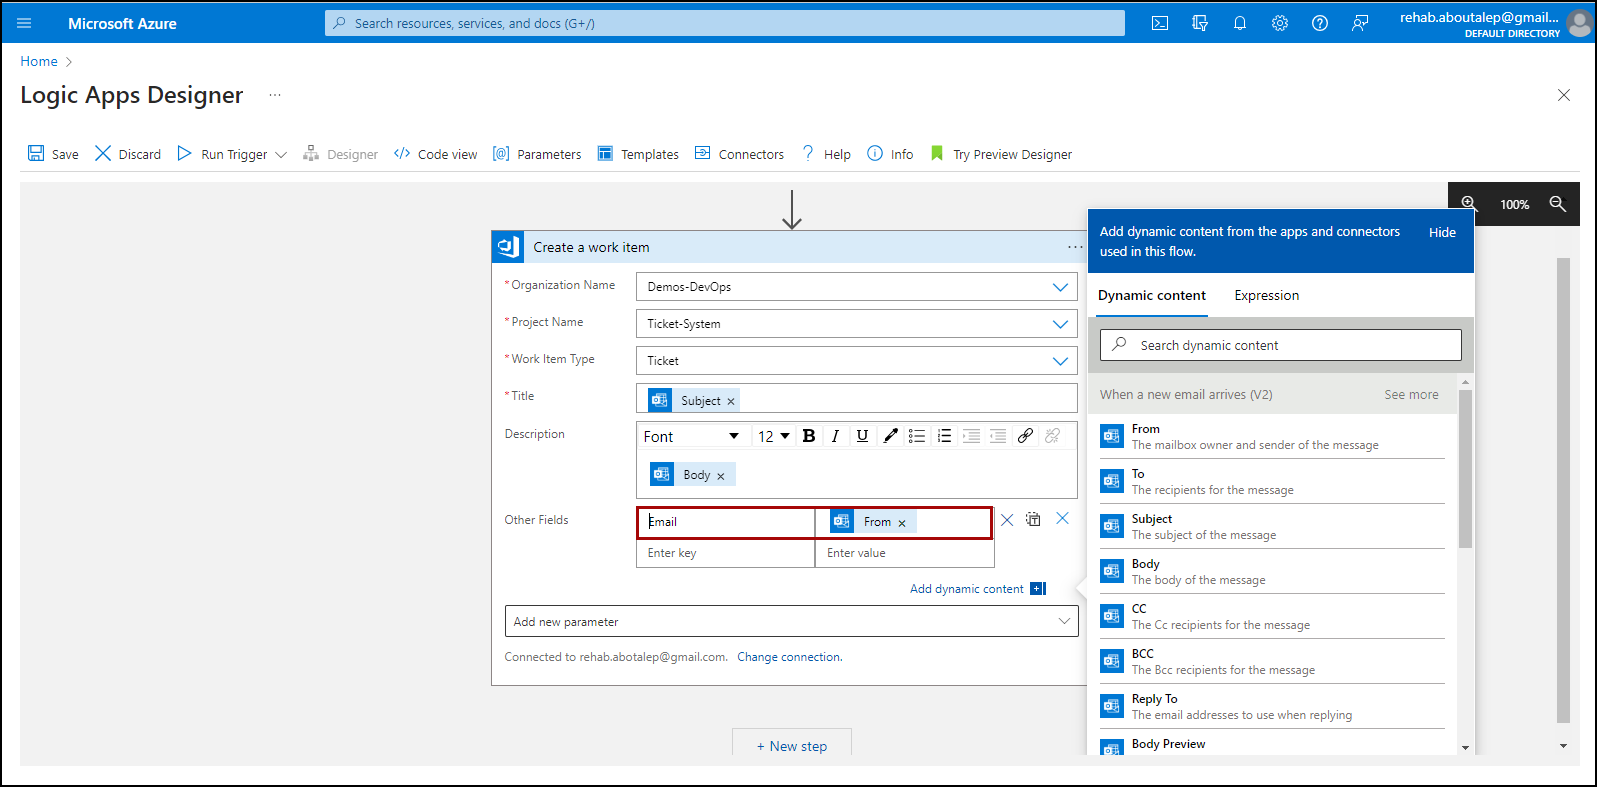
As we created a custom field in the prerequisites to capture the customer’s (sender) email, it’s time to configure it:
Click on
Add new parameters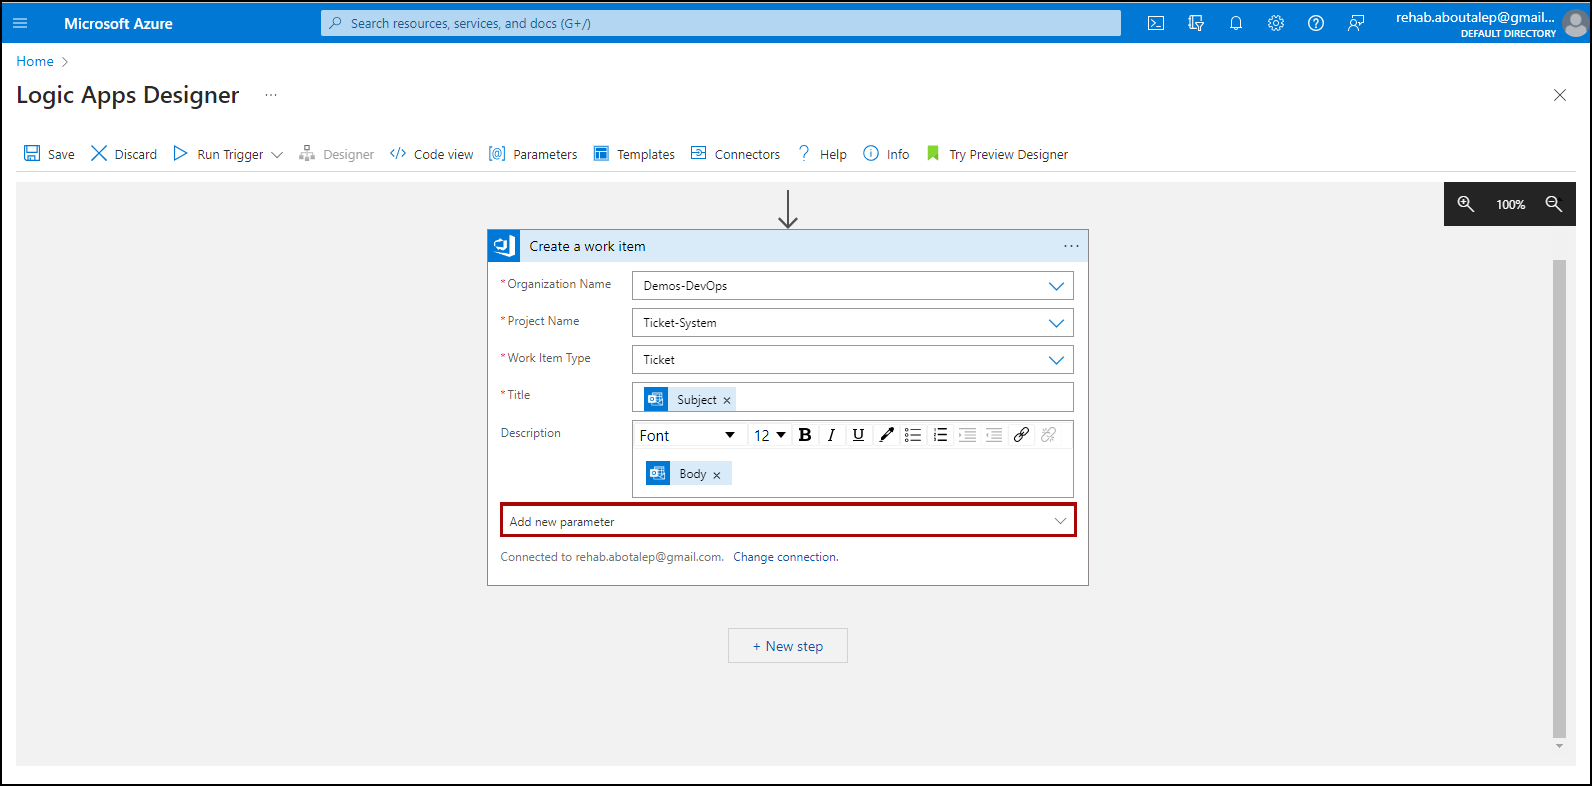
Select
Other Fieldsthat include custom fields.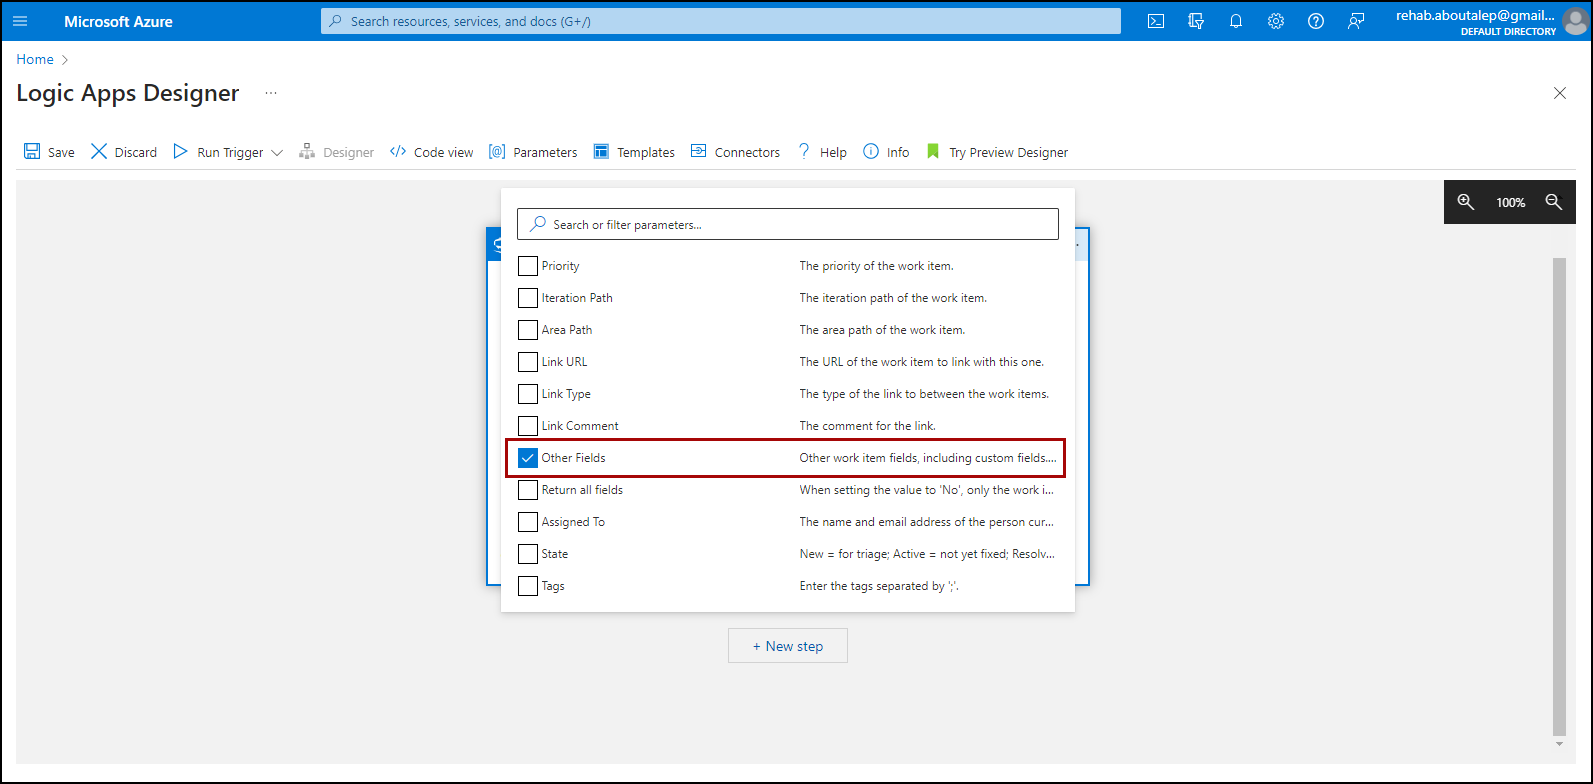
To configure the custom field for the customer’s email:
Set the key as the custom field name, which in this case is “Email”
For the value, select
From(sender) from the last step.
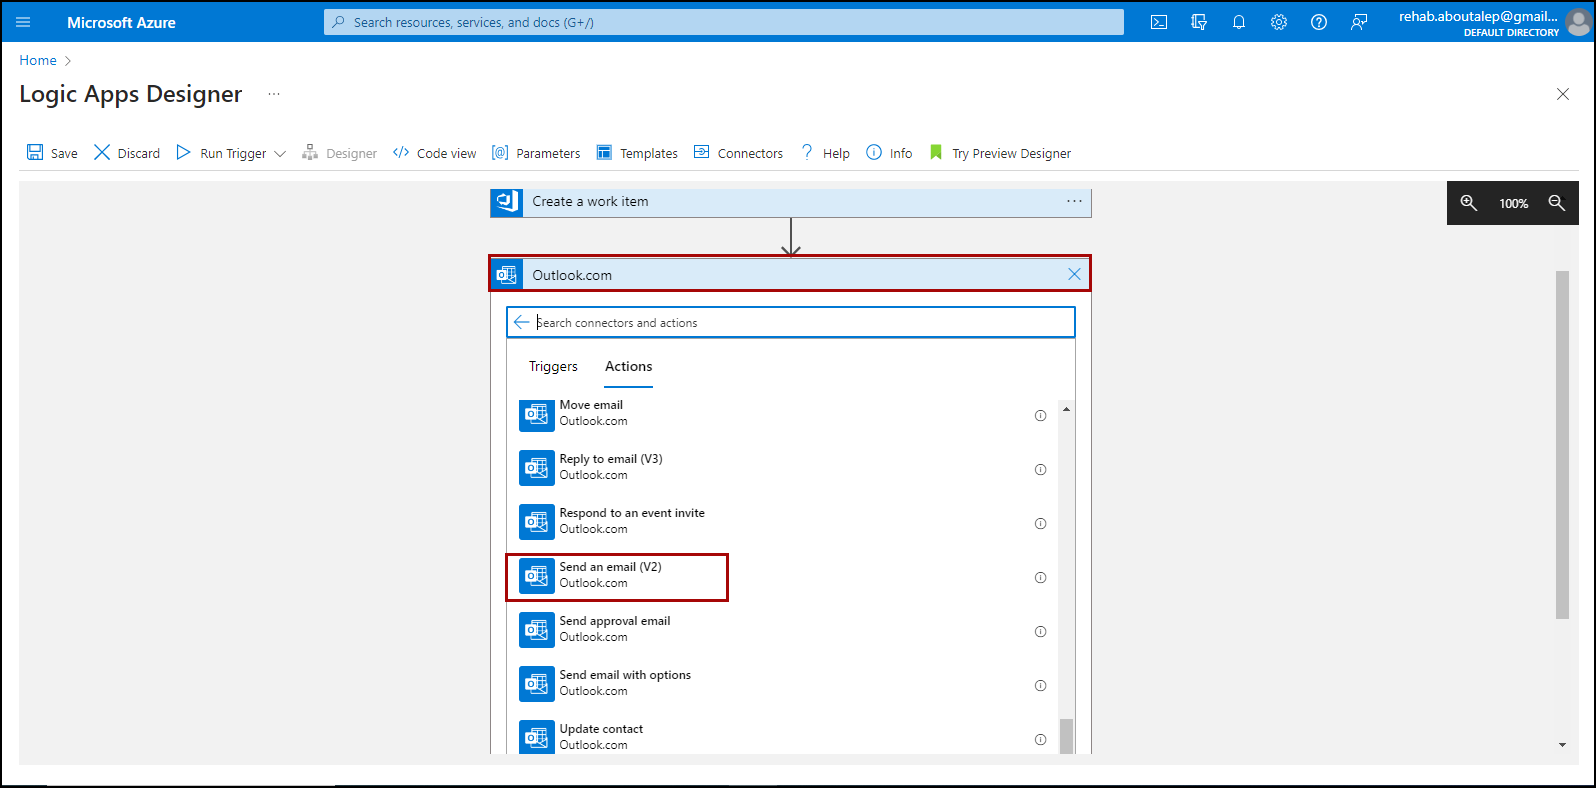
To add the second action, which involves sending an auto-reply email to the customer, follow these steps:
Select
New stepSearch for the
Outlookconnector and choose it.Next, search for the
Send an email (V2)action and select it.
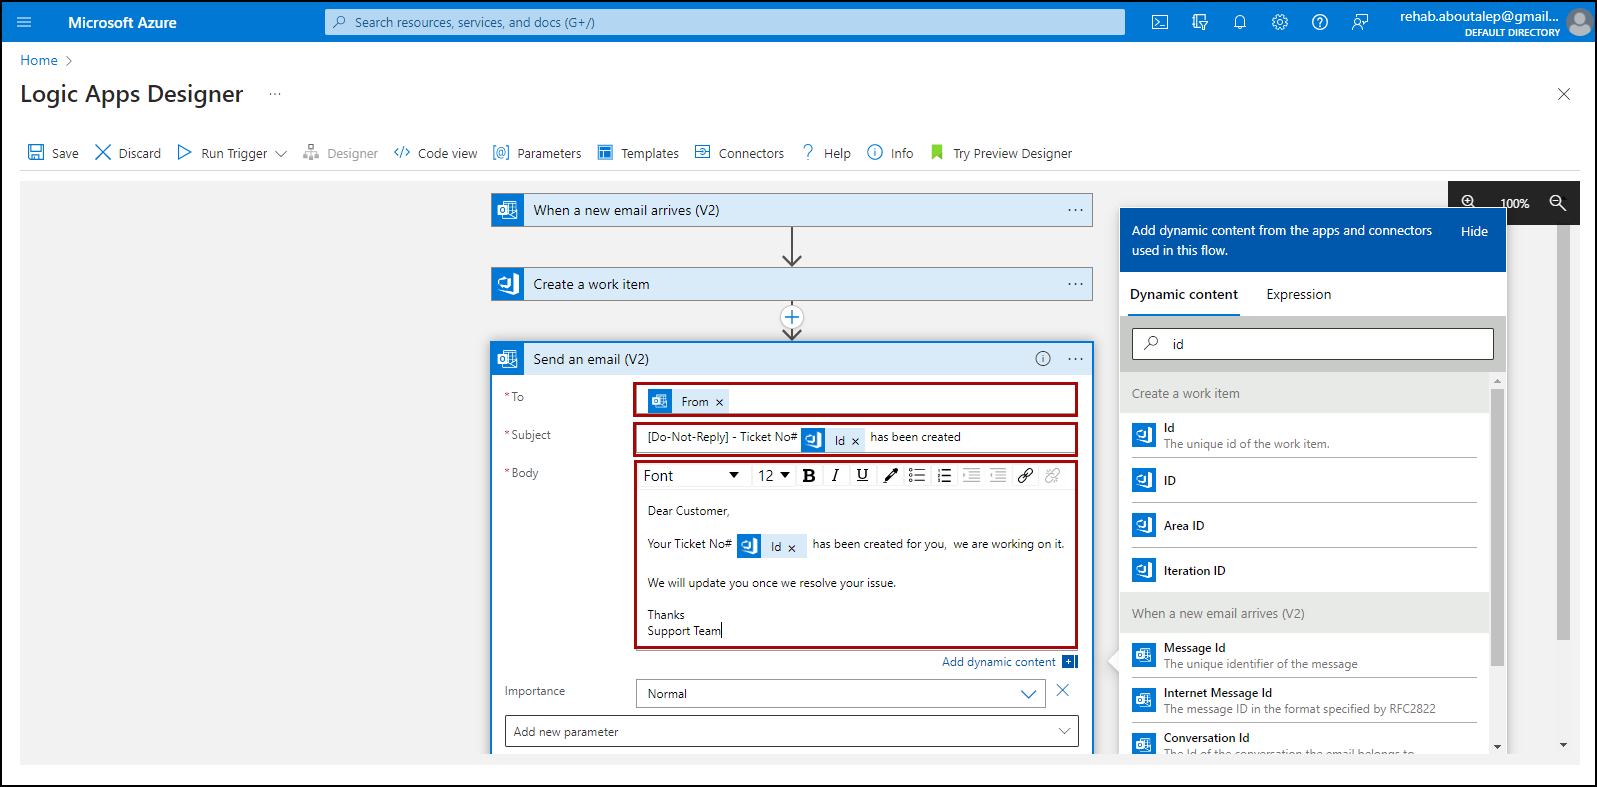
To configure the email attributes for the auto-reply:
To: Select
Fromfrom the right menu.Subject: Add the desired subject. You can add something like the following
[Do-Not-Reply]-Ticket No# <Id> has been createdBody: Add the desired content.
You can access the ID of the ticket from the last step of the workflow (When a new email arrives).
Now we are done developing the first workflow, click
Save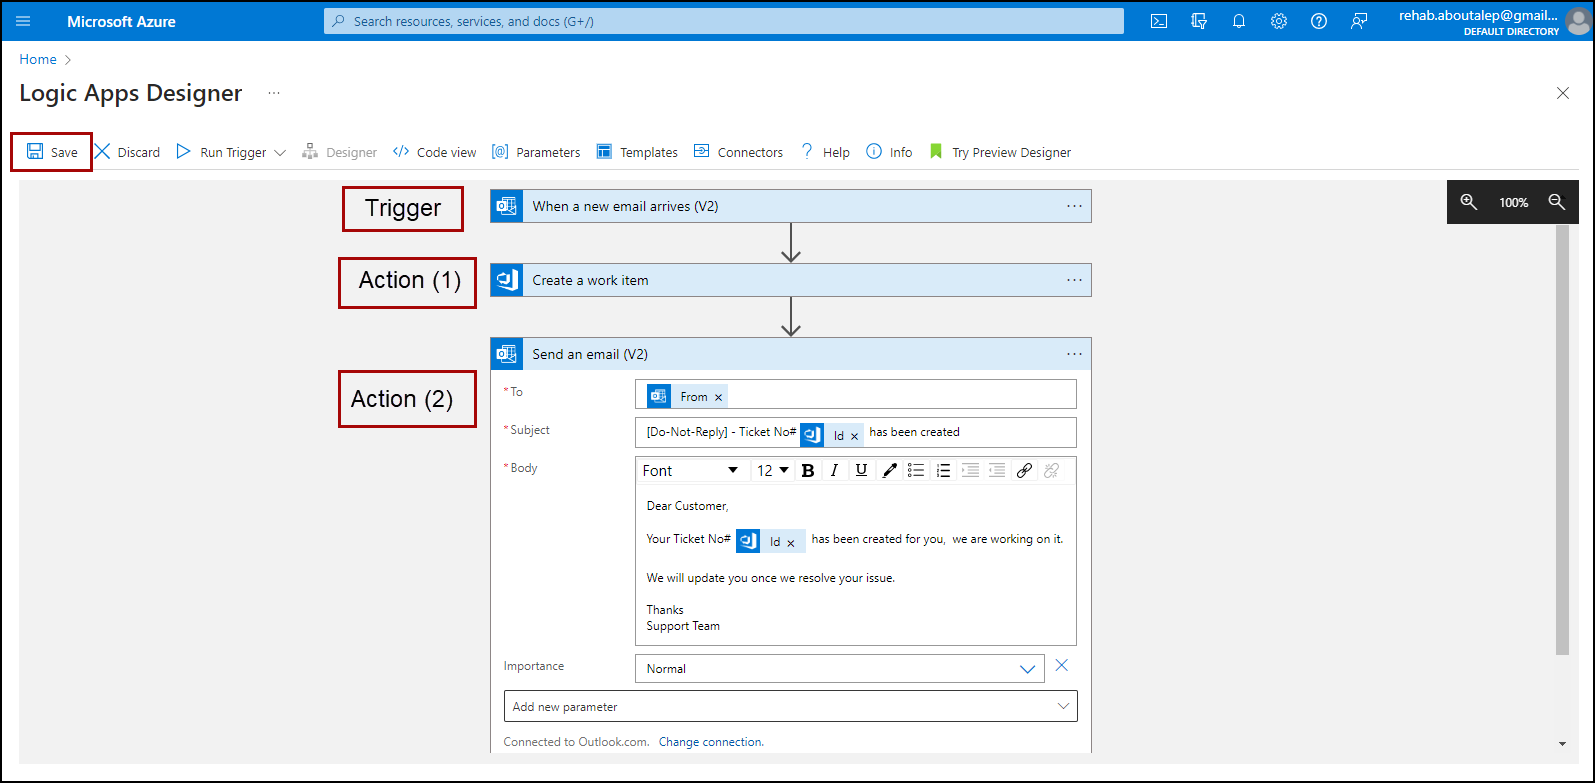
Task (2): Developing the second workflow
Since we’ve selected the Consumption plan, to start developing the second workflow, we’ll need to create a new Logic App.
Navigate to the resource group we’ve previously created, and click on
Addto add a new resource (Logic App).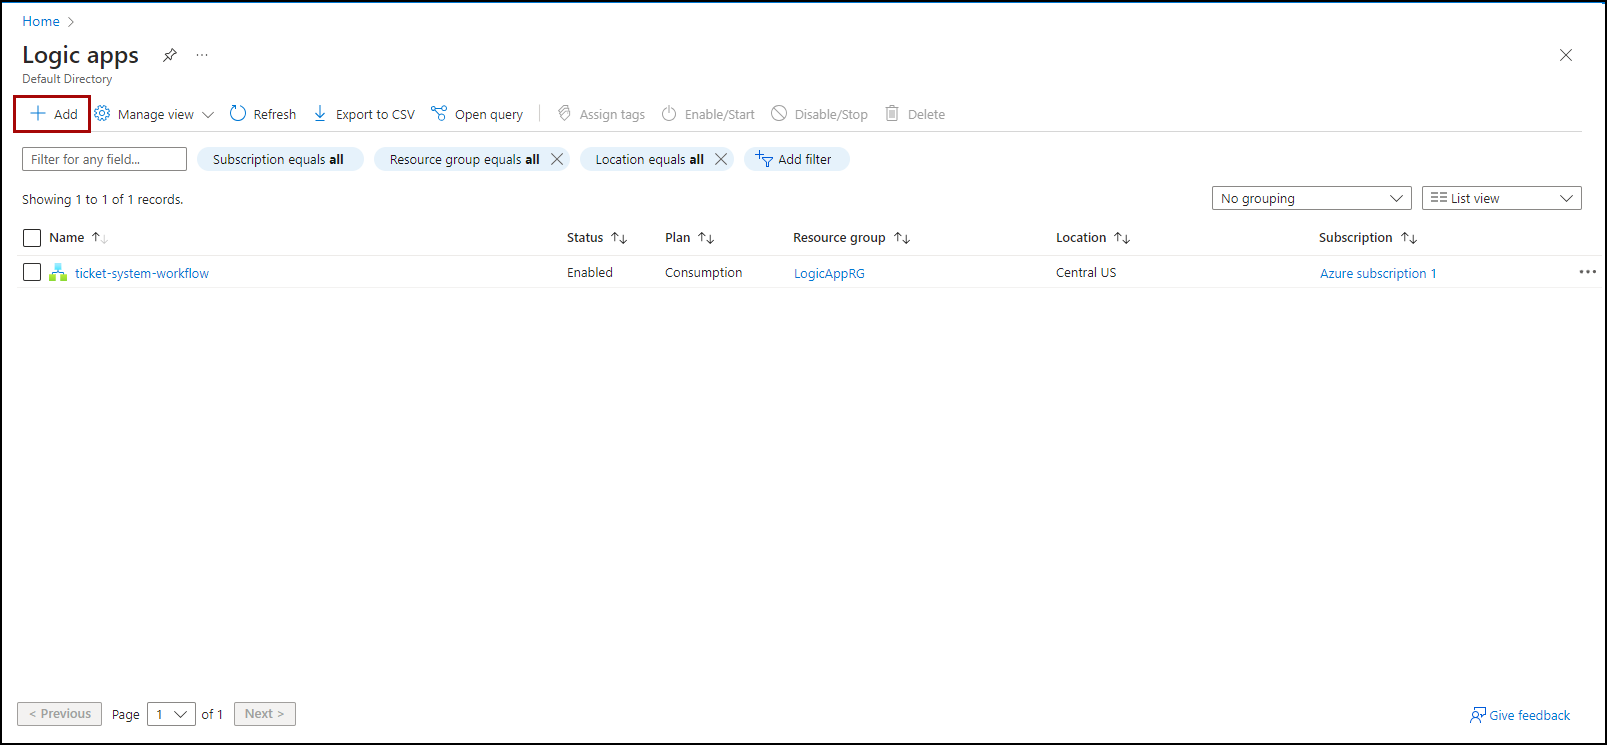
Enter the Project details for this Logic App, as we did in the
step (5)of the previous task.
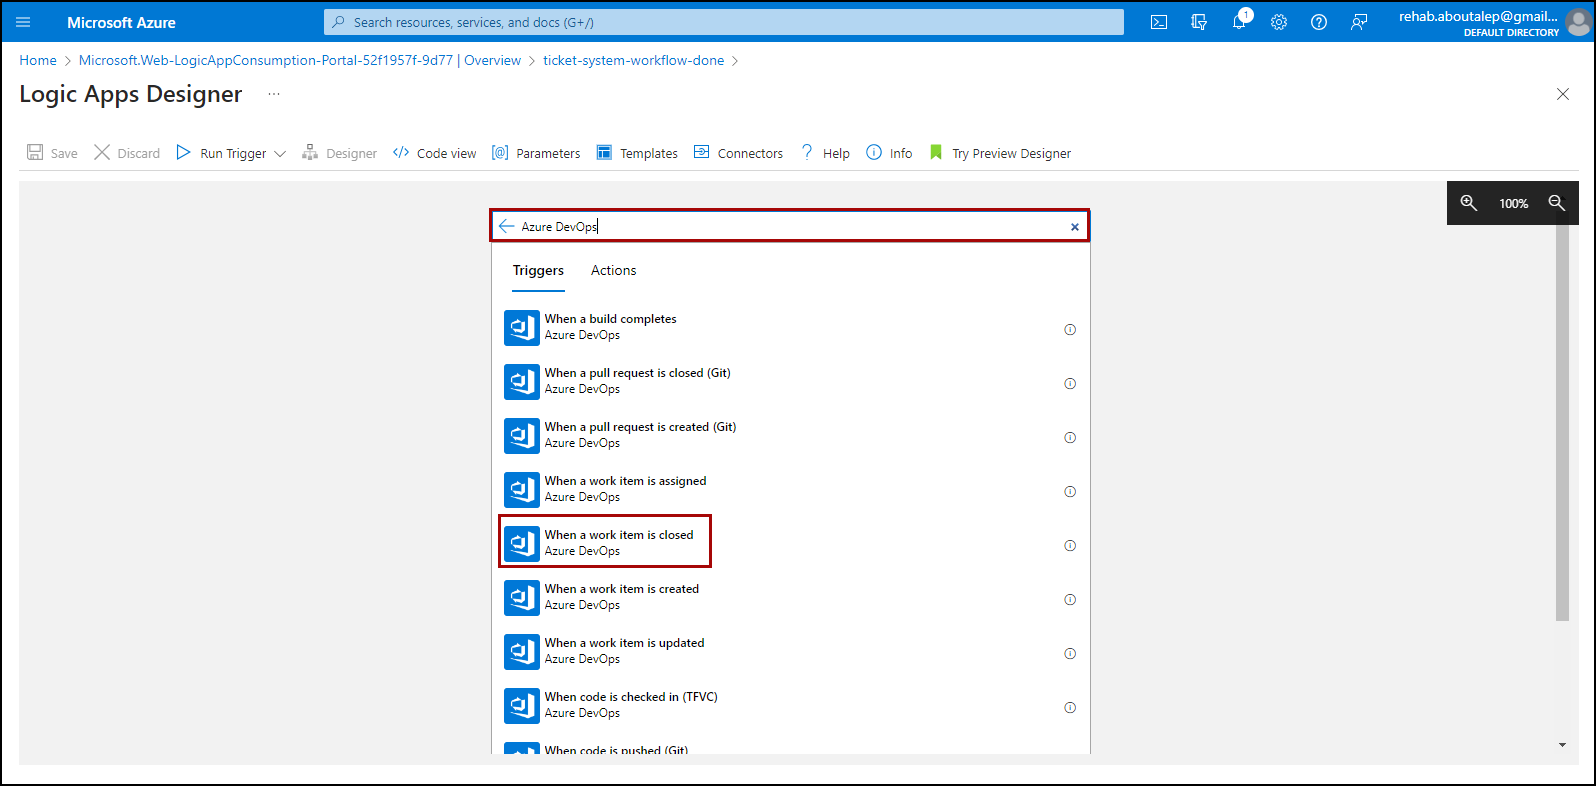
The trigger for the second workflow occurs when the work item created in the first workflow is closed. To configure this trigger:
Search for the Azure DevOps connector.
Select the
When a work item is closedtrigger from the available options.
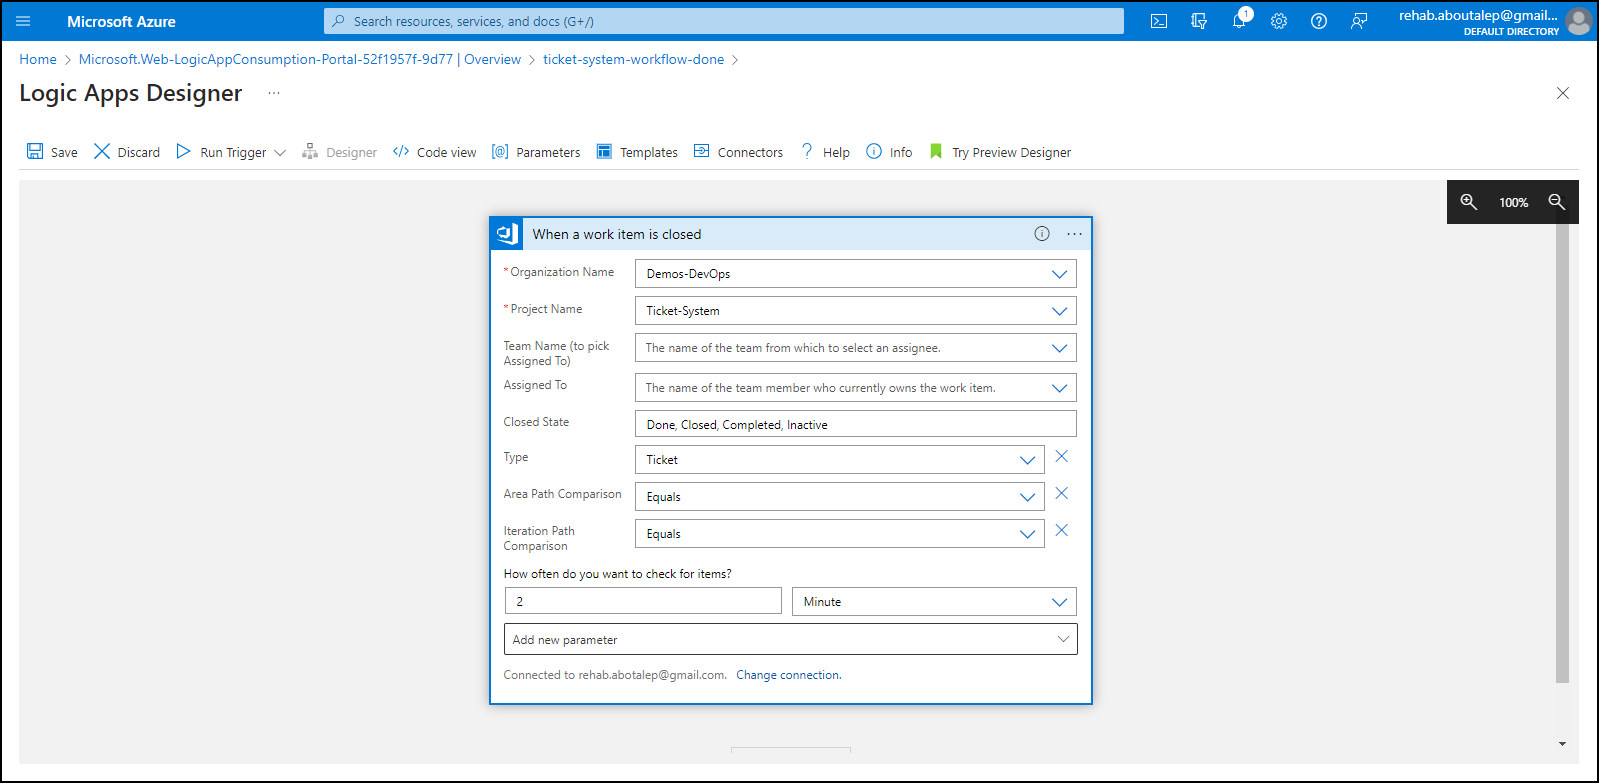
Add the required attributes:
Organization Name
Project Name
Type: work item type (Ticket in our case)
Since we configured the trigger, it is time for adding an action which is sending an email in our case, following the same steps as outlined in
step (21)of the previous task.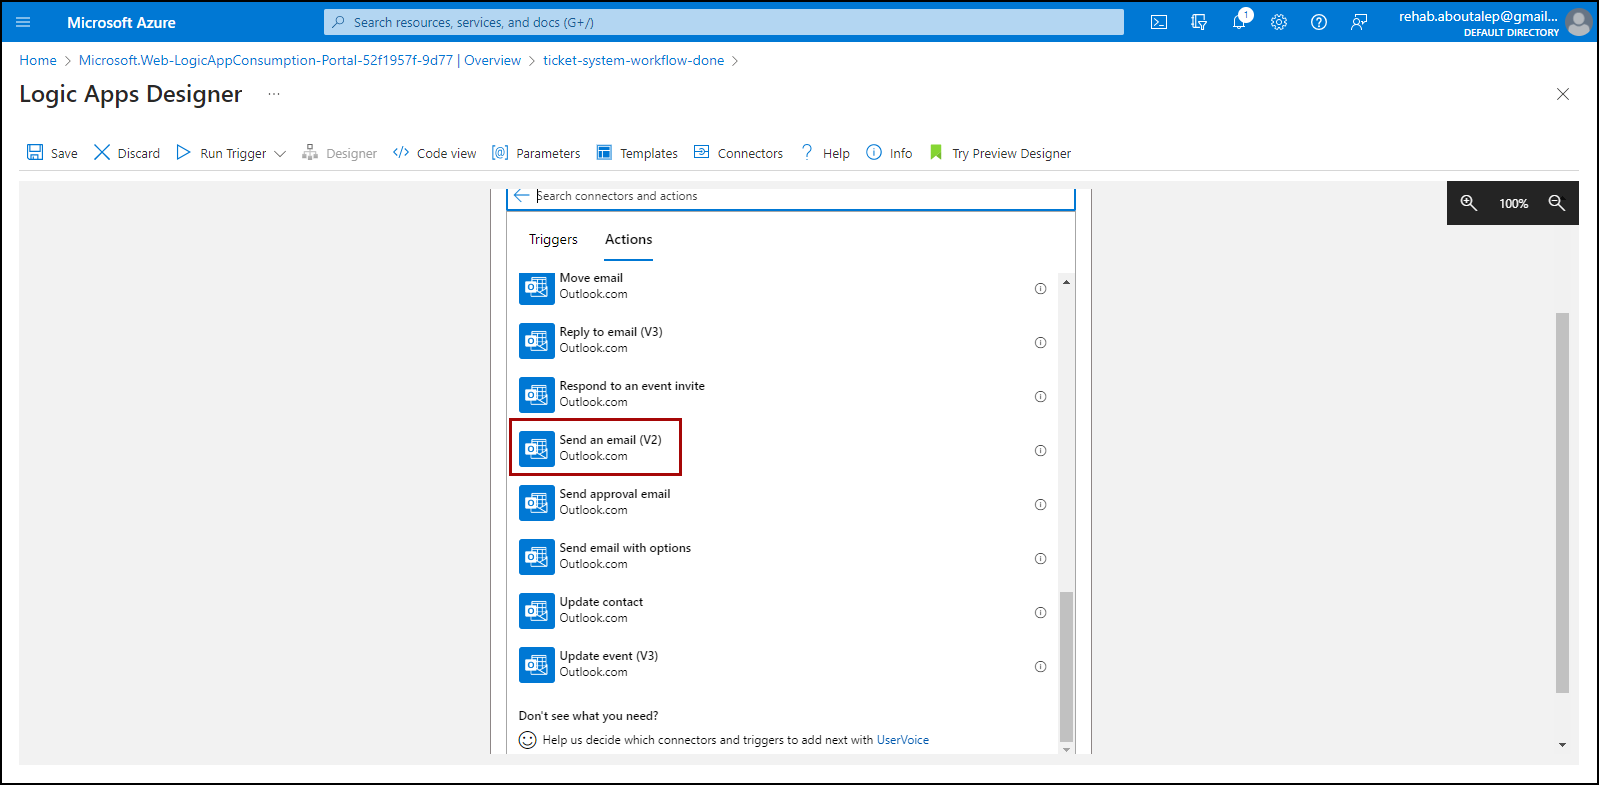
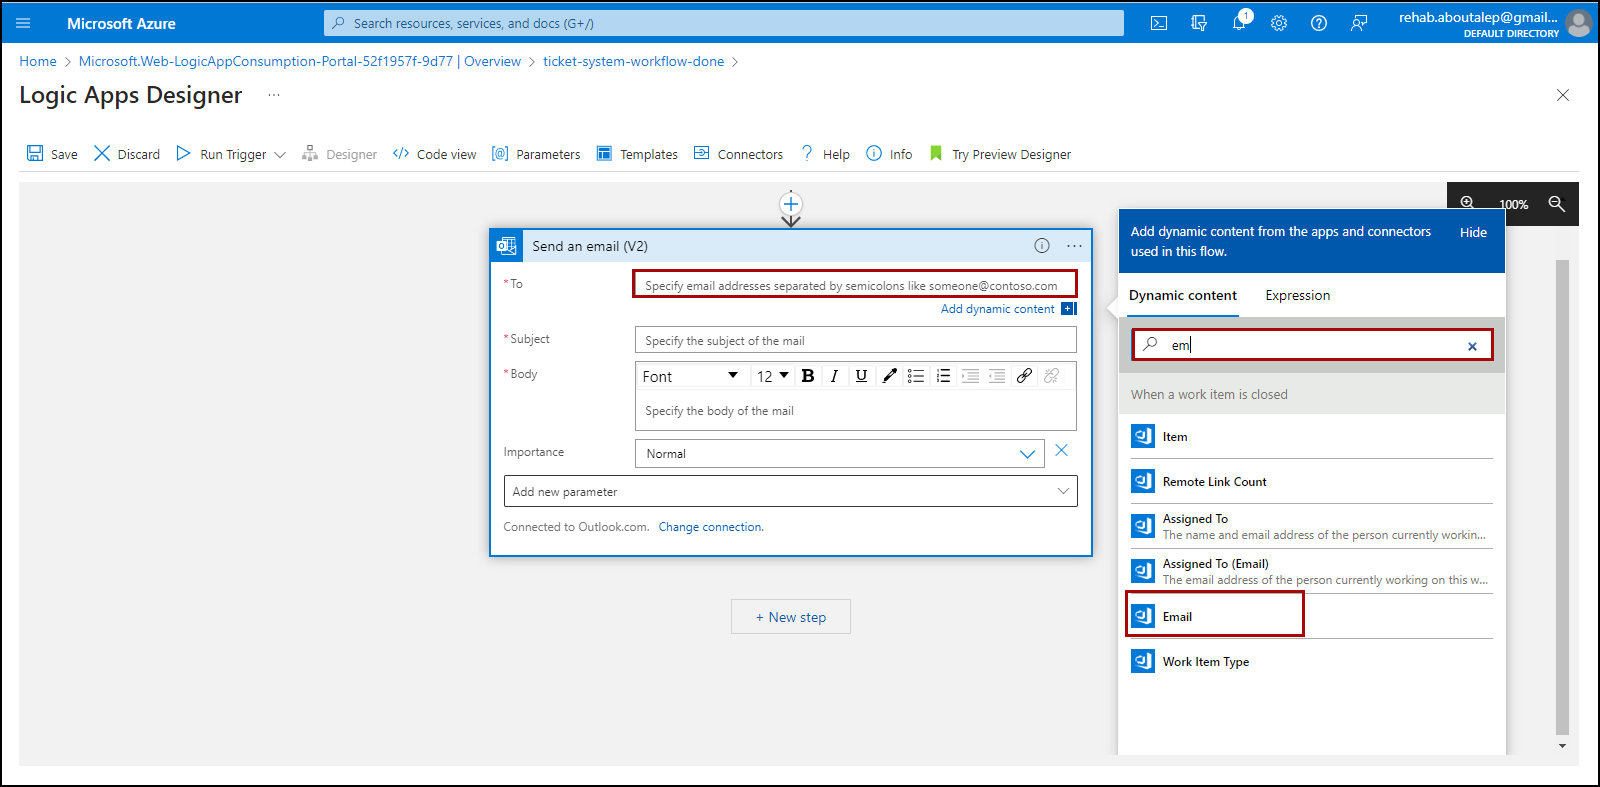
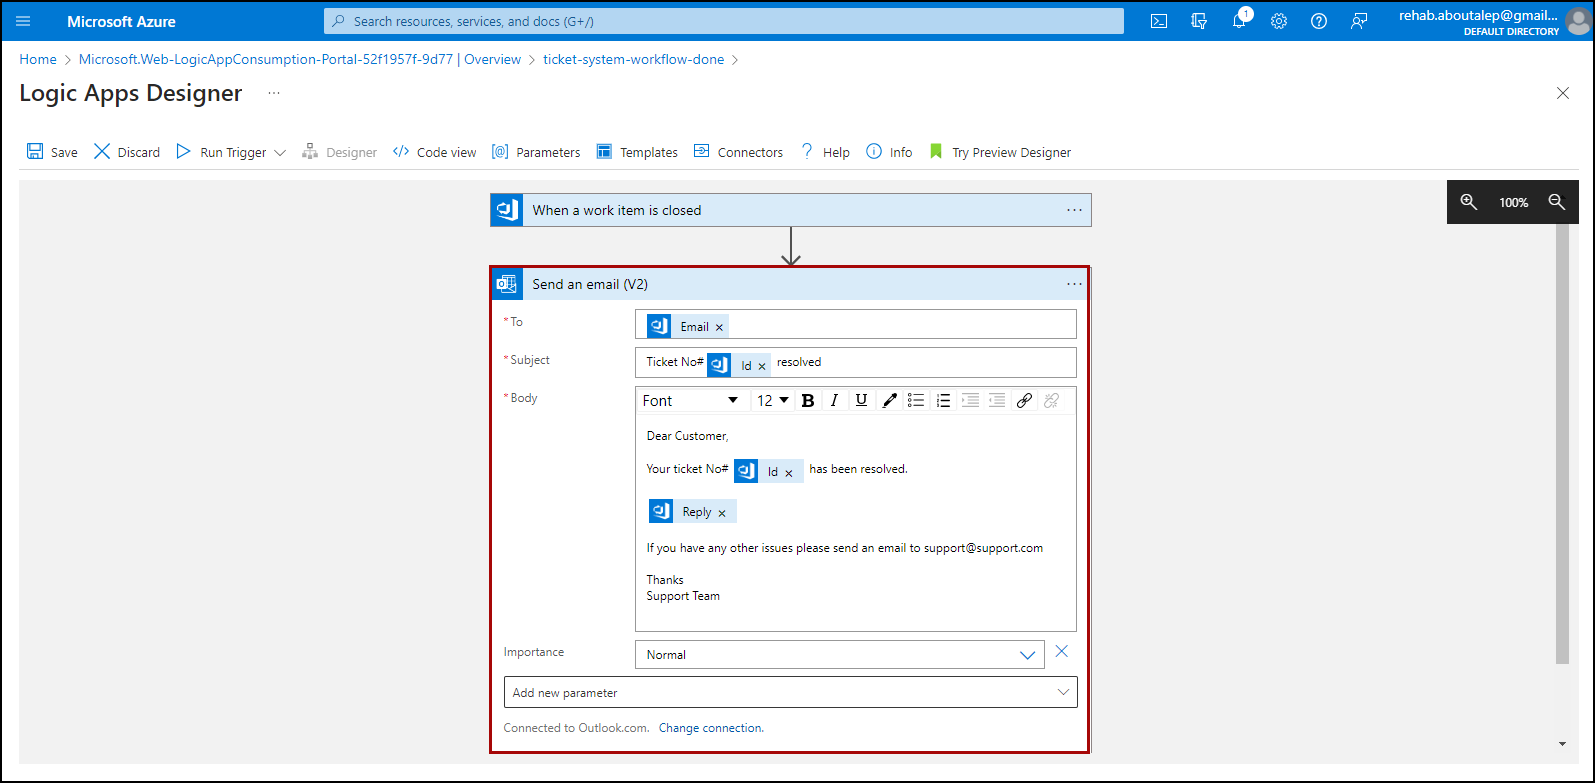
To configure the email attributes:
To: Select
Emailfrom the right menu. This custom field contains the sender’s email address, as we configured instep (18)of the previous task.Subject: Add the desired subject. You can add something like the following
Ticket No# <Id> resolvedBody: Add the desired content. To include the resolution of the customer’s issue, access it from the second custom field we previously created as prerequisite (
Reply).
You can access the ID of the ticket, Email, and Reply fields from the last step of the workflow (When a work item is closed).
Now we are done developing the second workflow, click
Save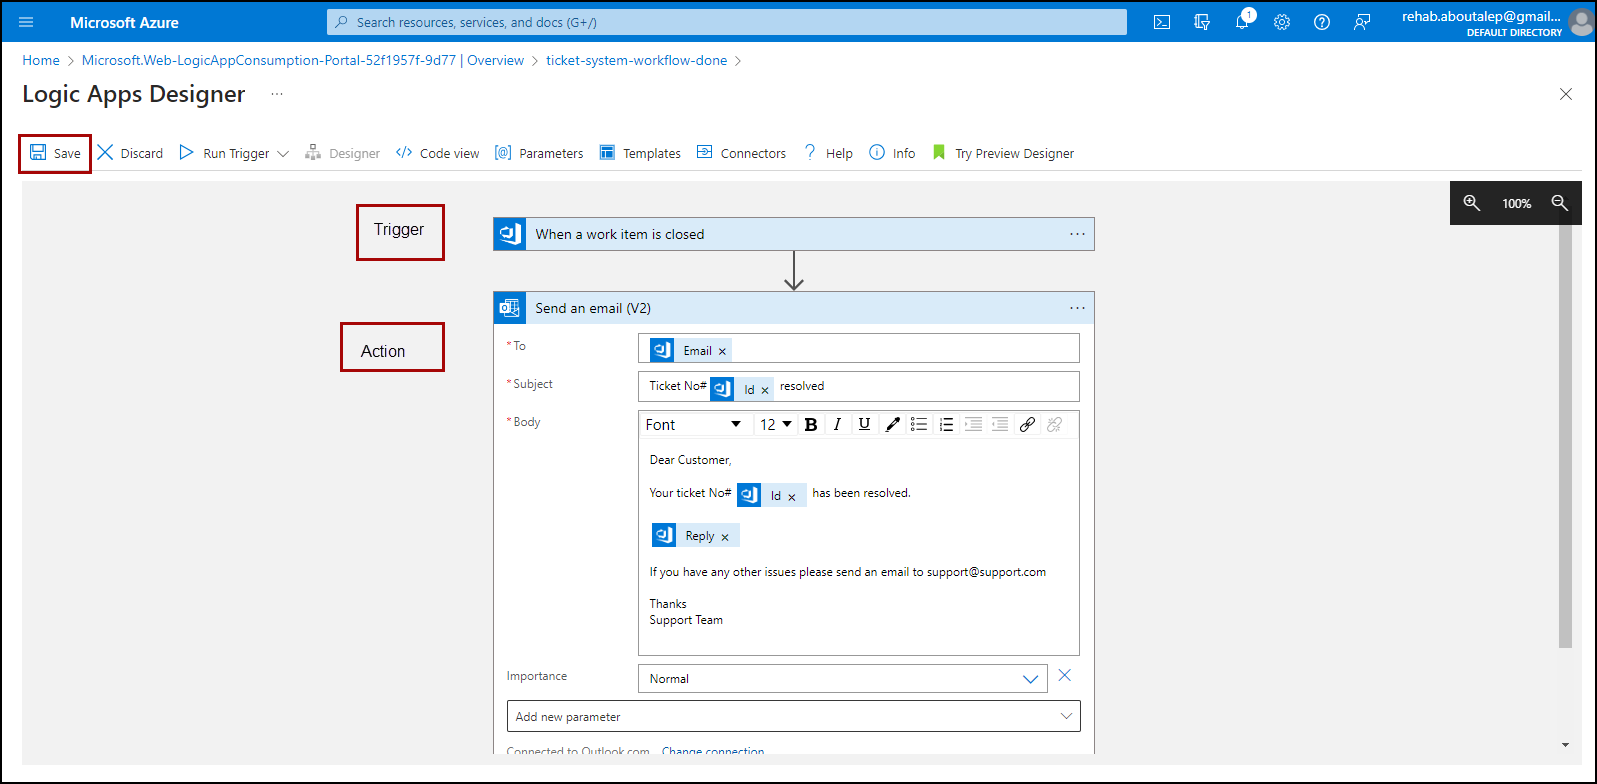
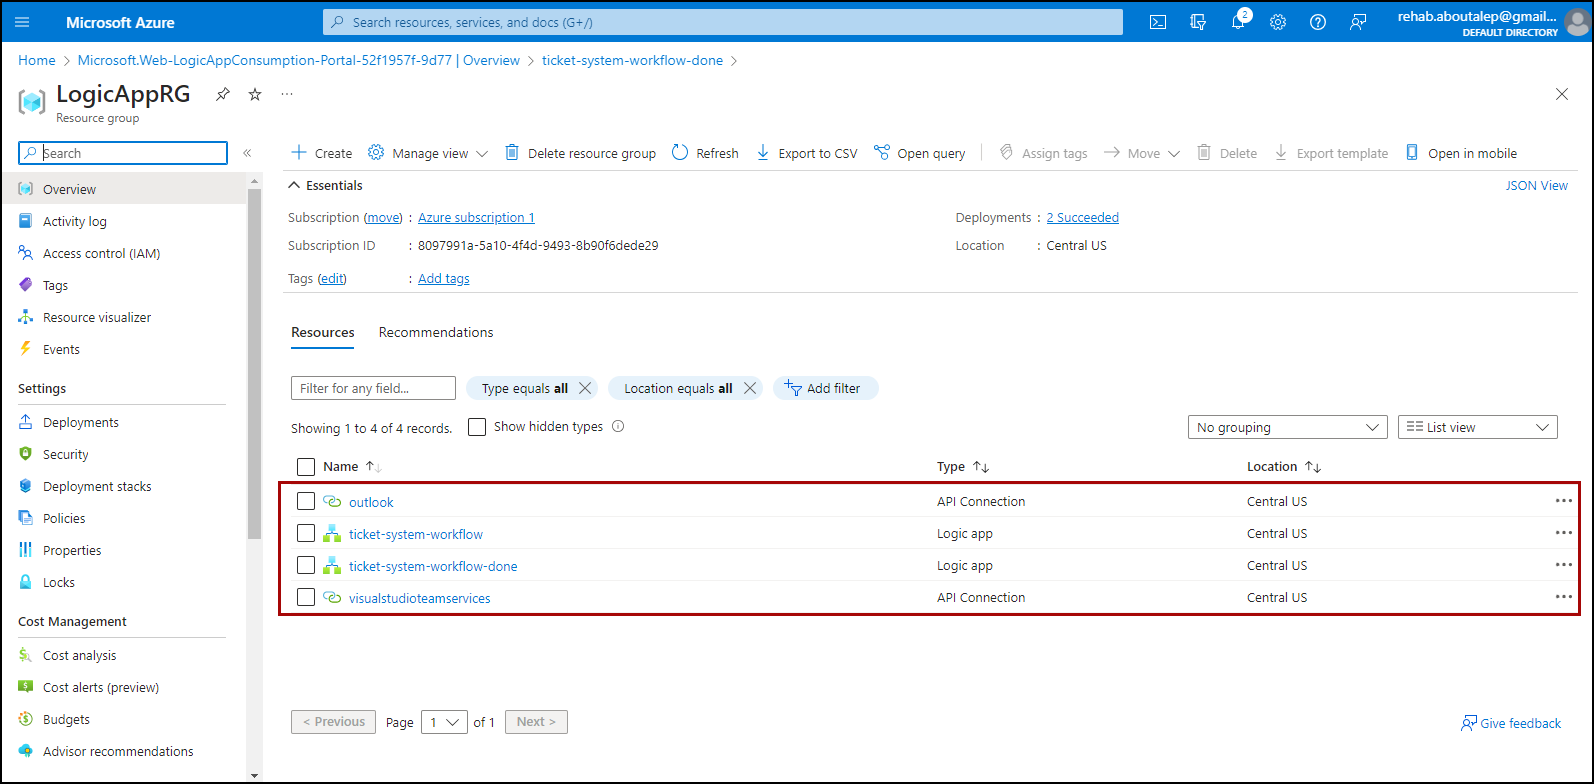
The following resources have been created upon the completion of developing the two workflows.
Test Workflows
Let’s test the workflows:
Let’s assume that I am a customer, I have an issue, and I want to report that issue, so I send an email to the support team.
Once the email is sent (the trigger of our first workflow), two actions will be performed.
- A new ticket is automatically generated in our DevOps organization project.
- An auto-reply email will be sent to the customer.
Now, it’s the support team’s turn. They will review the created ticket, assign it to a team member, and move the item from the New to approved state,
The assignee will move it to the committed state, start working on it, and once finished, will put the resolution of the issue in the Reply custom field and then close the item.
Once the item is closed (the trigger of our second workflow), an action will be performed.
- Sending an email to me, the customer, containing the resolution of the issue:
Take a look at the gif below:
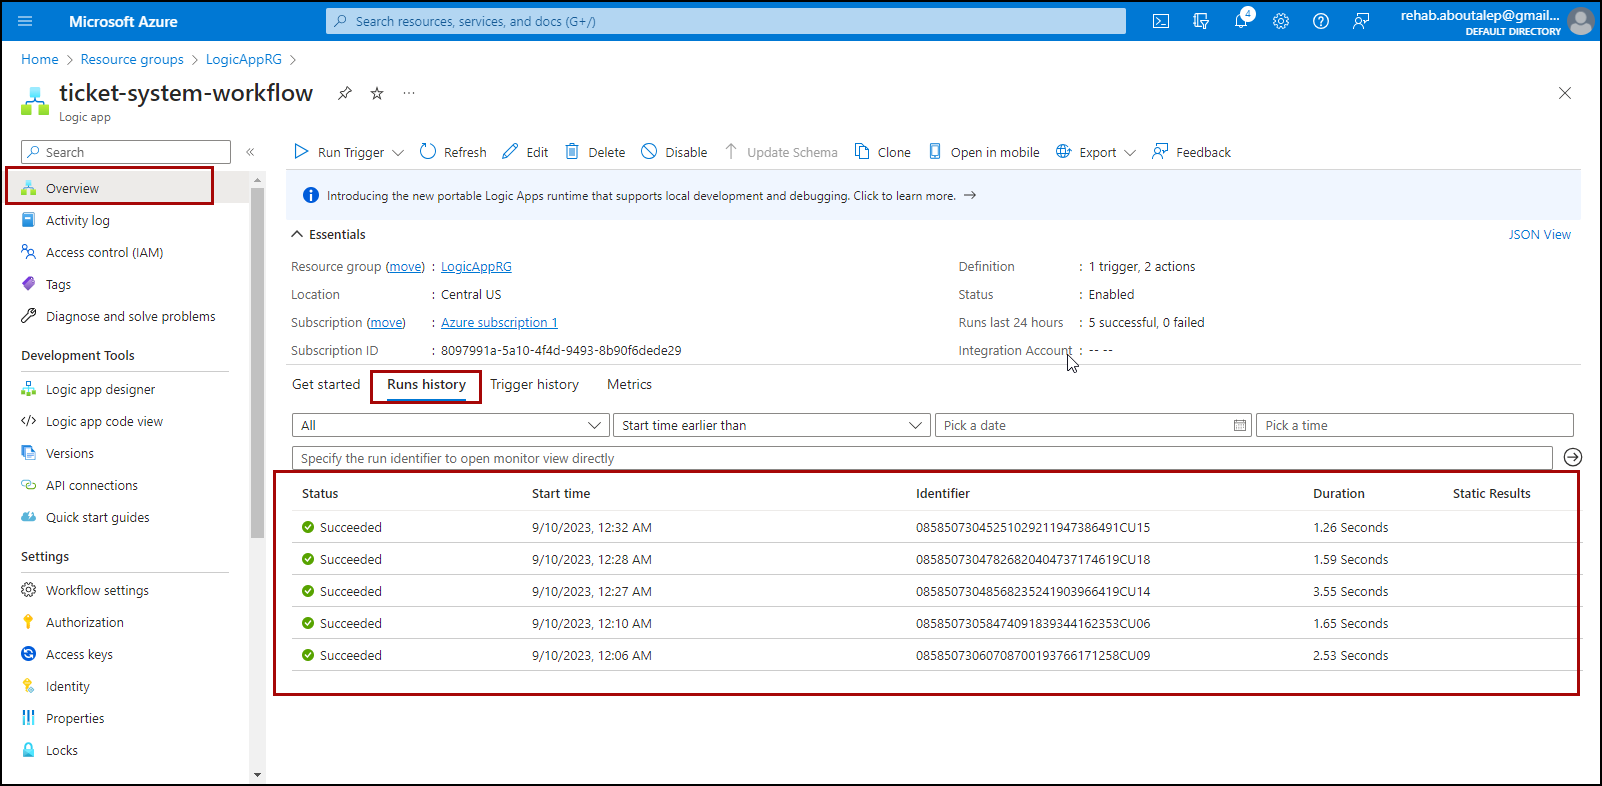
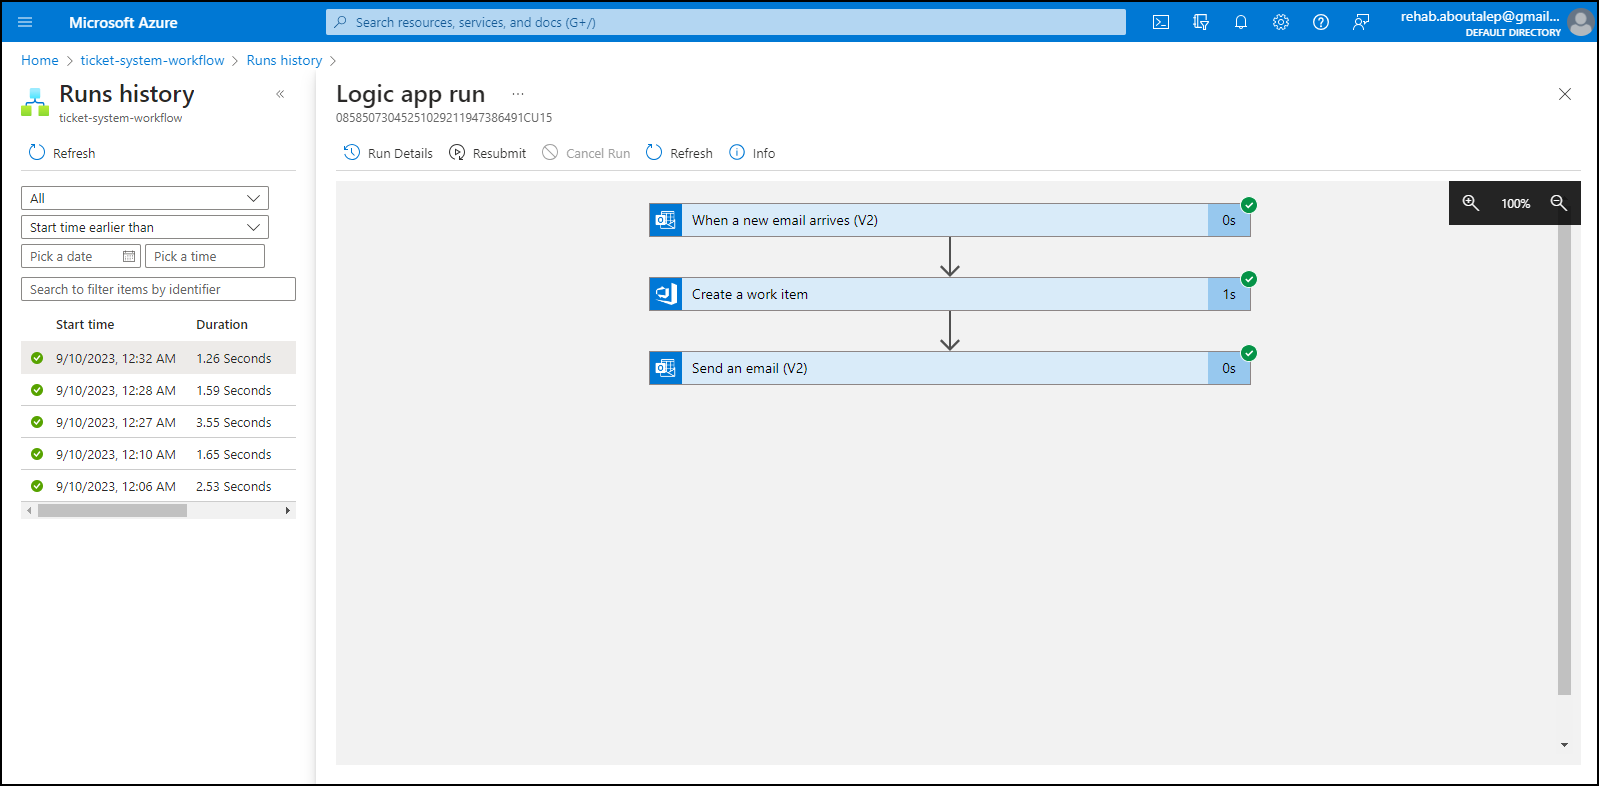
If you navigate back to the Logic Apps overview, you can find and access the Run history, which provides a record of the past runs of your Logic App workflows. This history allows you to track and monitor the execution of your workflows, including any errors or successful completions.
Logic App code view
You can find the code for the developed Logic Apps as following:
- On the Logic App’s menu, under Development Tools, select Logic App Code View.

References
Azure Logic Apps documentation
About process customization and inherited processes
You can watch the following video that walks you through all the steps explained in this post.